At a Glance
If your LG vacuum has stopped working or is having problems with power, charging, or losing suction it may be due to debris or dust clogging a nozzle or filter.
Try This
-
Select your vacuum
-
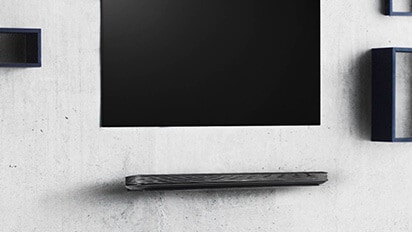
Stick Vacuum Issues
-
Normal Vacuum Issues
-
Robot Vacuum Issues
-
No Power
Show Script[LG Vacuums] Intermittent Power Issues - Stick Vacuum
If you're experiencing cleaning performance issues from your LG Cord Zero A 9 stick vacuum due to intermittent power or cycling noise, it may be due to the exhaust filter and green pre-filter being packed with dirt and debris. It could also be due to an obstruction in the inlet hose attachment, floor nozzle inlet, or finally it could also be due to the large dust separator filter being packed with dirt and debris.
Interpreting power issues, cycling noise, and loss of suction are indicators that the unit is in need of maintenance. Before you perform any maintenance, turn the vacuum off, empty the dust bin over a waste basket or trash can and remove the battery.
To clean the exhaust filter and pre-filter twist open the top lid on the back and body. The exhaust filter is built into the twist off lid. The green pre-filter can be accessed once the lid is removed. Shake off any large debris from the filters, clean off fine debris with a small brush over a trash can, or go outside and use a can of compressed air. When using compressed air on the exhaust filter, make sure to direct the air as shown from the outside in top-to-bottom. Directing the air from the inside outward compacts the dust and debris into the filter; this increases airflow restriction or clogs and reduces the filters performance even further.
In order to effectively dislodge the dust from each filter, direct the water flow as shown: Exhaust filter outside-in top to bottom. The pre -filter inside out. After washing the filters, allow them to thoroughly dry for at least 24 hours before reinstalling them. Reinstalling the filters before they are completely dry may result in mildew or odor. Reassemble the pre-filter first, then align the exhaust filter with the hollow indicator at top and turn the filter clockwise until the solid white indicators align.
To check the unit for clogs, detach the carpet floor nozzle and the one from the vacuum. Look through both ends of the wand and check for any debris or obstructions and remove them.
Now move to the body of the unit, check the inlet for any debris or obstructions and remove them to remove debris or obstructions from the floor or carpet nozzle inlets. Turn the nozzle over. A round locking mechanism attached to the nozzle side panel is shown. Use a coin and turn it counterclockwise to unlock it. Rotate the same panel 90 degrees and pull it outward to remove the roller brush. Shake off large debris over a waste basket or trash can.
Check the roller brush for any tangles or obstructions and remove them. Clean off fine debris with a small brush. With the nozzle in hand check both ends for debris or obstructions and remove them to reassemble. The floor or carpet nozzles follow the same steps in reverse.
To clean the large dust separator filter, enter the crevice tool into the large dust separator and turn it counterclockwise to remove it. Shake off any large debris from the dust separator over a trash can. Clean off fine debris with a small brush and the large dust separator can be rinsed in any direction. After washing the filters allow them to thoroughly dry for at least 24 hours before reinstalling them.
Reinstalling the filters before they are completely dry may result in mildew or odor. Before reassembling the filters, you may also want to brush off any dust around the motor housing using the brush attachment. Do not use any wet towels or spray water or cleaner in this area. Also keep your fingers or sharp objects out of the motor enclosure to avoid product damage, personal injury, or electric shock. Reinsert the large dust separator filter into the motor housing. Insert the crevice tool into the large dust separator and turn it clockwise to lock it in place and reinsert the battery.
Operating the product with wet filters or without the filters will allow dust to reach the motor and could cost it to malfunction.
To maintain cleaning performance, clean the filters at least once a month or as needed. Under certain conditions you may need to clean the filter more often. Examples of these conditions include: you vacuum everyday, you have pets in the home, you have wall-to-wall carpeting, or you wear shoes in the home.
If none of these solutions correct the issue with your LG cord zero A 9 stick vacuum, please contact customer service.
If you clean and maintain your vacuum properly you will continue to enjoy great cleaning performance from your LG cord Zero a 9 stick vacuum.
If the product is clogged with foreign objects, the power will be turned off automatically to protect the product.
Causes and Symptoms
- Socks or large dust are sucked into the extension pipe or nozzle.
- The dust bin is full of dust.
Troubleshooting
1Turn off the product and remove the extension pipe and nozzle.
2Check if there is any foreign object stuck inside the extension pipe or nozzle.
3To remove debris in the product body, remove the dust bin and the cyclonic mesh filter.
4Use a long wooden stick to clean the dust bin.
5Gently tap the extension pipe against the floor to remove any access debris.
NoteBe careful not to tap it too hard as it may damage the product.
6Use a wooden stick to remove the foreign objects stuck in the nozzle.
-
Not Charging
-
Cleaning the Dust Bin
-
Poor Suction
-
Cleaning the Agitator/Nozzle
-
ThinQ/Voice Assistant
-
Poor Suction
-
Cleaning the Agitator/Nozzle
-
Cleaning the Dust Bin
-
Cleaning the Dust Bin
-
ThinQ Connection
Android Devices
iOS Devices