Top Deals: Save 30-50% on select home appliances

Top Deals: Save 30-50% on select home appliances
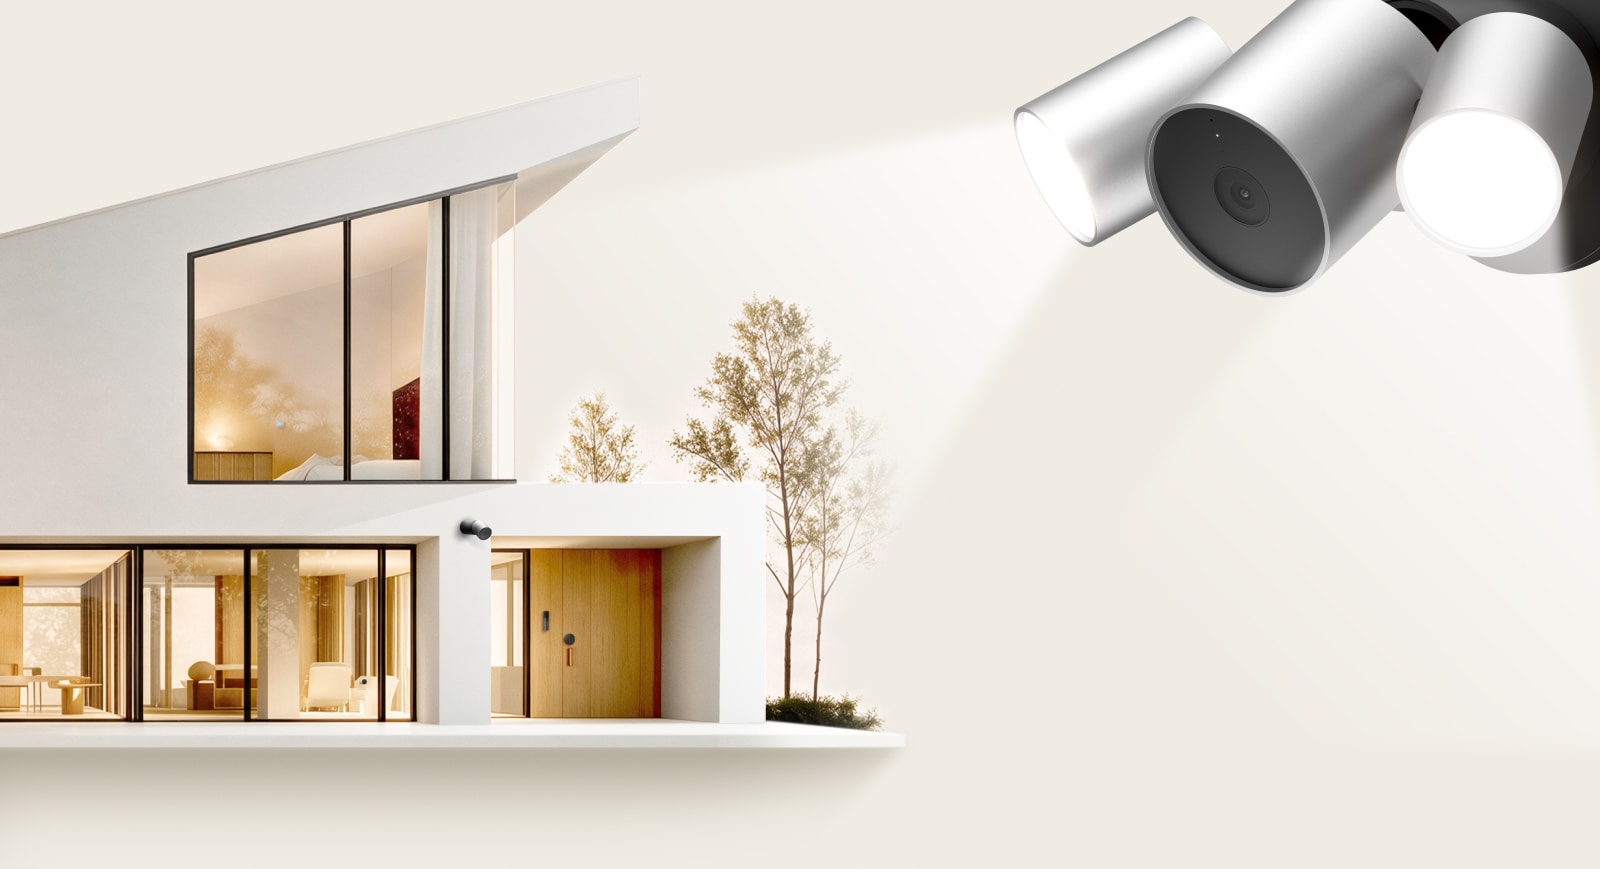
Home, in sync with you
Our smart home devices
-
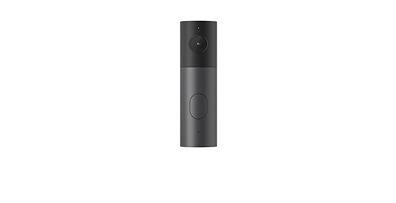
Doorbell

-
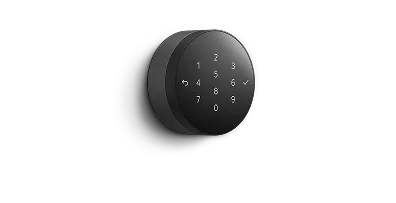
Door Lock
-
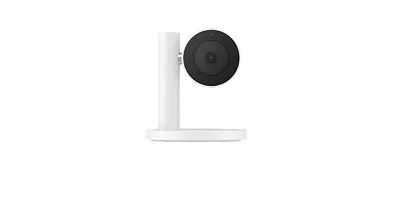
Indoor Camera
-
Outdoor Camera
-
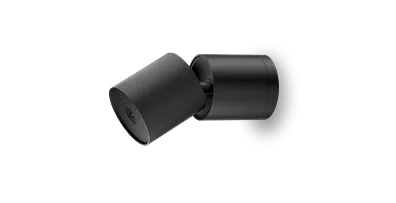
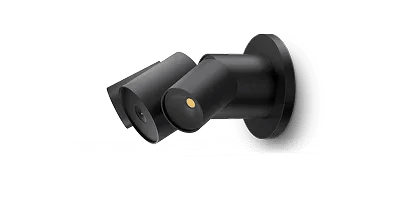
Outdoor Camera w/ Floodlights
-
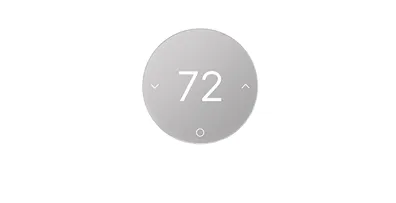
Smart Thermostat
Thermostat accessories
-
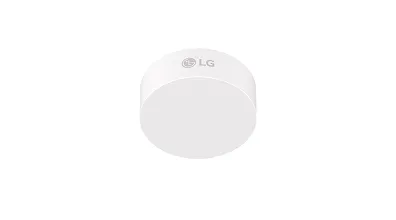
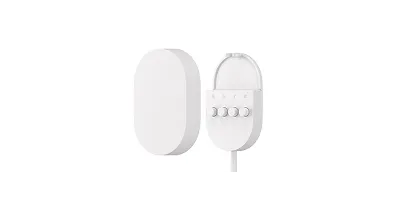
Temperature Sensor
-
C-Wire Adapter
Frequently asked questions
Every device integrates natively with Apple Home (via your Apple Home Hub) and the LG ThinQ App using uniform Matter and Thread configurations.
Battery-powered units (Smart Lock and Climate Sensor) use ultra-low-power Thread mesh networks to talk locally to your hub without crowding your router. This extends battery life, removes single points of failure and keeps devices fast, while streaming assets use high-bandwidth Wi-Fi.
Local physical features—like the Thermostat dials or the Smart Lock keypad—work completely offline. However, an active Apple Home Hub (HomePod, HomePod Mini or Apple TV 4K) is mandatory for remote controls, notifications and proximity keys.
Yes. Matter Multi-Admin architecture allows you to pair your assets to one platform (like LG ThinQ) and instantly share local operational access with another platform (like Apple Home) using a temporary pairing passcode.
Execute a full physical factory hardware reset on the unit, power-cycle your smartphone and Wi-Fi router, temporarily turn off active smartphone VPN profiles and confirm you are within range of your home hub before retrying.
When a device experiences power starvation, its internal logic prioritizes fundamental safety and control relays. To save power, it automatically throttles or disables power-heavy components like background Wi-Fi radios, radar proximity sensors or instant telemetry updates.
No. Always swap out your entire battery tray at the exact same time with identical, brand-new premium cells. Combining mismatched charge levels or distinct battery chemistries triggers erratic sensor data, uneven cell drain and terminal board damage.
The ecosystem runs on comprehensive security barriers. This includes end-to-end media stream encryption, cryptographic local device authentication keys, privacy-centric cloud environments and enforced Multi-Factor Authentication (MFA) to isolate your network from intrusion.
You can configure up to four distinct, localized digital Privacy Zones inside the application dashboard when using the ThinQ App. These zones place solid black masks over sensitive areas, completely blinding live streaming and background recordings across those specific coordinates.
Package contents: Doorbell Camera, Mounting Plate, Mounting Screws with Anchors, Extension Wire Screws, Extension Wires, Jumper Wire, Wire Nuts, Fixing Screw, and Screw Wrench. Check for missing or damaged parts before installation.
A dedicated 16–24 VAC, 30VA doorbell power supply is required. Verify the voltage with a tester and switch off power at the circuit breaker before installation.
No. Direct connection may cause fire or product damage. If a dedicated doorbell circuit is not available, install a transformer that converts 110/220 VAC to 16–24 VAC, 30VA.
Yes, but first inspect the wiring for exposed insulation, corrosion or damage. Damaged wiring may cause malfunction or overheating.
Before installation, contact a qualified electrician about installing dedicated doorbell wiring or a suitable step-down transformer.
Choose a location with a strong Wi-Fi signal. Do not point the camera directly at sunlight or another strong light source, which may damage the image sensor or reduce image quality.
Thick walls and metal doors can weaken Wi-Fi. If video is delayed or the connection is unstable, move the router closer or consider a Wi-Fi extender.
It is not recommended. Use a manual Phillips screwdriver to avoid damaging the product or screw threads.
To bypass a mechanical chime, connect the Jumper Wire between the TRANS and FRONT terminals, or the terminals used by the doorbell, and confirm the connection is secure.
Level the Mounting Plate and mark the holes. Route the wires through the center opening and secure the plate with the Mounting Screws. Gently check that the plate does not move.
Connect the Extension Wires to the rear terminals and secure them with the Extension Wire Screws. Join the other ends to the wall wiring with Wire Nuts, push the wiring into the wall and temporarily place the product on the Mounting Plate.
Yes. The camera adjusts left or right in 10° increments, up to 50°. After connecting the product to power and the app, use Live View to confirm the desired monitoring area before securing the angle.
After adjusting the angle, slide the product down to lock it onto the Mounting Plate. Tighten the bottom Fixing Screw with the supplied Screw Wrench.
The product is rated IP65. Do not submerge it or expose it to high-pressure water jets.
Operating temperature: -4–122 °F (-20–50 °C). Operating humidity: 0–90%. Maximum operating altitude: 9,842 ft (3,000 m).
For reliable performance, use iOS 15.0 or later or Android 10.0 or later.
Supports 2.4 GHz and 5 GHz Wi-Fi (IEEE 802.11 b/g/n/ac). Use WPA2 or WPA3 encryption.
No. Networks that require a web sign-in, such as those in hotels, cafés and airports, are not supported.
A Home Hub is optional. A compatible hub such as HomePod or Apple TV 4K with tvOS 16.1 or later enables remote control, real-time notifications and automations.
Hold the iPhone's NFC antenna near the product's NFC symbol. When the accessory card appears, tap Set Up and assign a room and name. If the product is not powered on, it will be added automatically once power is connected.
Yes. Turn on Bluetooth, connect your iPhone to Wi-Fi, then select Add Accessory. You can scan the QR code, tap the NFC area, select a nearby accessory or enter the setup code.
In LG ThinQ, select + > Add Product and confirm the product is powered on. Tap the phone near the NFC area, or choose Add without NFC and enter the Wi-Fi password. Hold the Option Button for at least 3 seconds to enter Bluetooth pairing mode, then follow the instructions in the app.
NFC antenna locations vary by phone. Move the top or center of the phone near the NFC label, remove thick or metal cases and try again.
Press and hold the rear Option Button for 3–10 seconds, or change the Wi-Fi network in the app.
The front camera supports up to 2.5K resolution, and the bottom camera supports up to Full HD (FHD) resolution. In LG ThinQ, Live Video Streaming and saved video are available at up to 2.5K for the front camera and FHD for the bottom camera.
The Device LED uses different colors and flashing patterns to show the product's status, including power, network connection, Factory Reset, Siren and Live View/Two-Way Talk.
Place it in a visible location to let people know recording may be in progress.
Night Vision helps capture clear video in low light. Auto switches between color and black-and-white based on ambient light. You can also lock the mode to Color or Black and White.
Yes. During Live View, you can hear sound near the product and speak with visitors. In the LG ThinQ app, only one user can use Talk at a time.
In the LG ThinQ app, you can enable person, animal, vehicle, package and motion detection. AI results are not guaranteed to be 100% accurate and may vary by installation environment.
Yes. Sensitivity can be adjusted for each AI object in the LG ThinQ app. Higher sensitivity increases detection frequency; lower sensitivity reduces it.
Yes. Select areas of the camera image that you want to keep private and mask them as Privacy Zones.
Apple Home supports Activity Zones. LG ThinQ supports Per-Zone Detection for up to four areas.
Yes. In the LG ThinQ app, draw up to four detection lines and set the movement direction to left, right or both.
The Spotlight illuminates the lower viewing area. In the LG ThinQ app, choose one of five brightness levels and set it to turn on automatically in low light when an event, approach or Ring Button press is detected.
Yes. You can add, edit or delete up to 15 Spotlight on/off schedules in the LG ThinQ app.
Yes. You can activate the product's Siren in the Apple Home app to sound an audible warning nearby.
Use Factory Reset if restarting does not resolve an issue or before transferring the product to another user. It deletes settings and video recordings and restores default settings.
Download any needed video, switch off power at the breaker and remove the bottom Security Screw. Hold the Option Button for 10–20 seconds. Release it when the Device LED flashes red and a tone sounds. After reset, the product returns to pairing standby and must be set up again.
The unintended action is canceled. For a Factory Reset, release the button between 10 and 20 seconds.
Defaults are restored as follows: Vision Mode Auto; AI Detection Off; sensitivity Medium; microphone Off; device sound Medium; Device LED On; timestamp Off; Live Status On; bit rate Off; Siren duration 15 seconds; Spotlight brightness Low; Event Detection Off; Approach Detection On; Doorbell Press Detection On. The current firmware remains installed and cannot be downgraded.
Check the Wi-Fi signal. Thick walls and metal doors can block it. Move the router closer or consider a Wi-Fi extender.
Use a clean, dry microfiber cloth on the lens, speaker/microphone openings and Ring Button. Do not spray water or cleaner directly on the product, touch it with wet hands or use sharp objects in the openings.
Firmware updates may improve performance, correct issues or add features. Do not disconnect power during an update. If an update fails, the product automatically returns to the previous version. Downgrades are not supported.
For the LG ThinQ Activity Log, the oldest clips are automatically deleted to make space for new recordings.
Recording public areas or neighboring property without consent may be restricted. Video and audio laws vary by location and may require consent from everyone recorded. Review all applicable local surveillance and privacy laws.
The product surface may become hot after extended use. To help prevent burns, avoid touching the camera body, metal housing or power adapter. Install in a ventilated area away from direct sunlight and heat sources.
No. Do not open or disassemble the product. It contains no user-serviceable parts and may present an electric-shock hazard.
Damage or failure caused by incorrect current or voltage, improper installation, adjustment or operation, misuse, unauthorized repair or improper maintenance may not be covered by the warranty.
Compatible door dimensions:
• Door thickness: 1-9/16–2 in (40–51 mm)
• Cross bore: 2-1/8 in (54 mm)
• Edge bore: 1 in (25.4 mm)
• Adjustable backset: 2-3/8 or 2-3/4 in (60 or 70 mm)
The lock cannot be installed on a door without a lever and latch bolt, as the door will not remain securely closed. A metal interior door between the entrance and the hub may interrupt communication.
For a stable connection, install the lock and hub on the same floor and as close together as practical. Walls, metal doors, concrete structures, and other obstructions may reduce wireless range.
For security, installation is not recommended when a window or glass panel is located near the door. If installation is necessary, consider additional security measures such as a secondary lock or security film.
The LG Smart Deadbolt Lock is rated IP55.
Dust and Water Resistance
This device is designed to meet the IP55 rating for dust and water resistance under IEC 60529 and IEC 62368-1, 3rd Edition, at the time of shipment from the factory. However, it is not completely dustproof or waterproof.
Dust and water resistance are not permanent conditions and may diminish or be lost over time due to normal wear, repair, disassembly, or damage. Dropping the device may also compromise its dust- or water-resistant performance.
The lock is ANSI/BHMA Grade 2 certified for verified durability and reliability. ANSI/BHMA is a North American standard that evaluates the durability, strength and security performance of builders hardware using Grades 1–3.
Operating temperature: -4–140 °F (-20 – 60 °C). Operating humidity: 0–90%.
For reliable performance, use iOS 15.0 or later or Android 10.0 or later.
A compatible hub such as HomePod, HomePod mini or Apple TV 4K with tvOS 16.1 or later enables remote control, real-time notifications and automations in Apple Home App.
Hold the iPhone's NFC antenna near the product's NFC symbol. When the accessory card appears, tap Set Up and assign a room and name. If the product is not powered, it will be added automatically after power is connected.
Yes. Turn on Bluetooth and connect the iPhone to Wi-Fi, then select Add Accessory. You can scan the QR code, tap the NFC area, select a nearby accessory or enter the setup code.
No. The LG Smart Deadbolt Lock uses Thread, which is designed to provide a stable connection with lower battery consumption than Wi-Fi.
Up to 250 access codes can be registered: up to 150 directly on the lock and up to 100 through the app.
Press and hold the Option Button for 10 seconds, then release it. The lock will restart and the reset will be complete. A notification tone sounds after 3 seconds and again after 10 seconds. Release the button after the second tone to begin the reset. Always reset the lock before moving or transferring it to another user.
No. UWB is available only when a supported iPhone or Apple Watch is connected through HomePod. See Apple's website for compatible models.
No. NFC access is available only when a supported iPhone or Apple Watch is connected through HomePod. See Apple's website for compatible models.
Outside: use a registered access code, a registered iPhone or Apple Watch with NFC or UWB or the physical key behind the rotating front cover. Inside: rotate the interior knob to retract the deadbolt.
Without a hub, phone connection and most smart features—including iPhone/Apple Watch access and settings—are unavailable, but keypad locking and unlocking remain available. With a compatible hub, all supported NFC, UWB, app and settings features are available.
Calibration establishes the closed-door position for the door sensor, enabling open/closed detection and automatic locking. Close the door during calibration. Recalibrate after a factory reset or battery replacement, unless batteries are replaced while the door is closed and locked.
In Apple Home, confirm Unlock on Approach is enabled. Register the lock in Home, follow the Remote Access prompts to add the home key to Wallet, then verify Unlock on Approach is enabled for that card.
In Apple Home, confirm Tap to Unlock is enabled. Register the lock in Home, follow the Remote Access prompts to add the home key to Wallet, then verify Tap to Unlock is enabled for that card.
Recalibrate the door sensor with the door fully closed. On the lock, rotate the interior knob to Close twice; or run Calibration in the app. Always keep the door closed during calibration.
Replace depleted batteries. If the issue continues, reinstall the product and confirm that the slide connector between the exterior and interior assemblies is fully connected.
A low-battery alert appears at 30% or below. Replace all batteries at the same time and do not mix new, used or partially used batteries. If fully depleted, rotate the front cover and connect a 5 V power bank to the exposed USB-C port for emergency power.
Typical battery life is about six months. If it is shorter, check whether the deadbolt rubs against the strike or makes noise when locking; interference increases motor load and battery use. Adjust the strike as needed. Cold temperatures may also increase battery drain. Replace all batteries together and do not mix battery conditions.
Hold the Release button on the bottom of the interior assembly while pulling the battery cover. See the installation video for guidance. If it still will not release, inspect the housing for deformation or damage.
This camera is for indoor use. Place it on a tabletop or shelf or mount it to a ceiling. Do not install outdoors or where it may be exposed to water or high humidity. Wall mounting is not an intended installation option.
Not recommended. At night, infrared light may reflect from the glass and cause glare or make the image difficult to see.
Rated input is DC 5 V, 3 A, with 15 W rated power consumption. Use the supplied power adapter and USB-C cable.
To fit the Mounting Plate, the cable's outer diameter must be approximately 4.8 mm (3/16 in) or less. For safety, use the supplied adapter and cable.
The product supports 2.4 GHz and 5 GHz Wi-Fi.
Check for wiring and pipes behind the mounting surface and use fasteners suitable for the material. Secure the supplied Mounting Plate with both screws and confirm it does not move.
Drywall may require the supplied anchors. Anchors may not be needed when fastening directly to a stud or structural support. Confirm that the mounting surface is sound.
Yes. We recommend completing app setup before ceiling mounting because NFC tagging and button access may be difficult afterward.
Enable Flip Image in the app and confirm the image orientation so AI Detection can operate correctly.
Operating temperature: 32–104 °F (0 – 40 °C). Operating humidity: 20–80%.
For reliable performance, use iOS 15.0 or later or Android 10.0 or later.
This product supports 2.4 GHz and 5 GHz Wi-Fi (IEEE 802.11 b/g/n/ac). Use WPA2 or WPA3 encryption.
No. Networks that require a web sign-in, such as those in hotels, cafés and airports, are not supported.
A compatible hub such as HomePod, HomePod mini or Apple TV 4K with tvOS 16.1 or later enables remote control, real-time notifications and automations in Apple Home App.
Hold the iPhone's NFC antenna near the product's NFC symbol. When the accessory card appears, tap Set Up and assign a room and name. If the product is not powered, it will be added automatically after power is connected.
Yes. Turn on Bluetooth and connect the iPhone to Wi-Fi, then select Add Accessory. You can scan the QR code, tap the NFC area, select a nearby accessory or enter the setup code.
In LG ThinQ, select + > Add Product and confirm the product is powered on. Tap the phone near the NFC area, or choose Add without NFC and enter the Wi-Fi password. Hold the Option Button for at least 3 seconds to enter Bluetooth pairing mode, then follow the app.
NFC antenna locations vary by phone. Move the top or center of the phone near the NFC label, remove thick or metal cases and try again.
Press and hold the rear Option Button for 3–10 seconds, or use Wi-Fi Network Change in the app.
The lens can be adjusted from 0° to 270°. Do not force it beyond its natural stop, and do not hold or block the head during automatic movement.
Yes. Infrared illumination provides night video in low light. Auto, Color and Black-and-White modes are available. Image quality may vary by environment.
No. AI Detection is an assistive monitoring feature and may not always be accurate. Smoke and carbon-monoxide sound detection does not replace dedicated detectors.
Keep the power cable at least 3.3 ft (1 m) from cribs, bassinets and play areas, and do not use an extension cord. Do not allow children to touch or play with the automatically rotating camera.
Review and follow all local privacy and recording laws. Where required, notify people that recording is in progress and obtain consent.
Periodically check that the mounting screws and plate remain secure and inspect the USB-C cable for damage. Clean the lens and moving parts with a dry microfiber cloth.
This plug-in camera is for outdoor wall installation. When possible, install under an eave or cover to reduce exposure to direct sunlight and rain.
Yes. A suitable outlet must be within reach of the supplied approximately 20 ft (6 m) adapter cable. Plan the cable route before installation.
Rated input is DC 5.3 V, 3.3 A, with 17.5 W rated power consumption. Use only the supplied power adapter.
Not recommended. Use the supplied adapter and integrated mounting cable to maintain safety and water resistance.
For best detection, install 7–10 ft (2.1–3 m) above the ground. Lower installation may reduce detection distance and coverage.
Use the supplied anchors and screws for typical surfaces. Anchors are not needed when fastening directly to a wood stud or structural support.
Form a drip loop and route the cable so water cannot run toward or collect at the power connection.
Yes. Complete app setup before final wall mounting.
Operating temperature: -4–122 °F (-20 – 50 °C). Operating humidity: 0–90%.
Turn on Bluetooth and connect the phone to a stable Wi-Fi network. In LG ThinQ, tap + > Add Product and select the device. Confirm it is installed and powered, then use NFC or choose Add without NFC and enter the Wi-Fi password. Hold the Option Button for at least 3 seconds and wait for the app to complete setup.
Check that the phone has a stable Wi-Fi connection and move the router and product closer together. Restart both if needed. Confirm the product is powered and in setup mode. For NFC, enable tag reading and remove thick or metal phone cases, or choose Add without NFC. Reduce wireless interference, confirm LG ThinQ is current, restart or reinstall the app, and contact Customer Support if setup still fails.
For Unpowered NFC, hold the top of the iPhone near the NFC symbol, tap Set Up, and assign a room and name. If the product is not powered, connect power and wait for automatic detection. For manual setup, enable Bluetooth and Wi-Fi, put the product in pairing mode, tap + > Add Accessory, then scan the QR code, use NFC, select a nearby accessory, or enter the 8-digit setup code. Follow the prompts to finish room, name, and recording options.
Reset the product, wait about one minute, and try again. Confirm the product is powered, in pairing mode, and on the same Wi-Fi network as the iPhone or iPad. Enable Bluetooth, Location Services, and Home in iCloud; update iOS; restart the Home app and devices; disable VPN; restart the router; remove duplicate registrations; confirm the product is not tied to another Apple ID; verify the Home, QR code, and setup code; update firmware; and try another iPhone or iPad if needed.
For reliable performance, use iOS 15.0 or later or Android 10.0 or later.
This product supports 2.4 GHz and 5 GHz Wi-Fi (IEEE 802.11 b/g/n/ac). Use WPA2 or WPA3 encryption.
No. Networks that require a web sign-in, such as those in hotels, cafés and airports, are not supported.
A compatible hub such as HomePod, HomePod mini or Apple TV 4K with tvOS 16.1 or later enables remote control, real-time notifications and automations in Apple Home App.
Hold the iPhone's NFC antenna near the product's NFC symbol. When the accessory card appears, tap Set Up and assign a room and name. If the product is not powered, it will be added automatically after power is connected.
Yes. Turn on Bluetooth and connect the iPhone to Wi-Fi, then select Add Accessory. You can scan the QR code, tap the NFC area, select a nearby accessory or enter the setup code.
Open the app and tap the camera to view live video at up to 2.5K resolution. Streaming quality adjusts automatically based on internet conditions and cannot be changed manually.
The continuously powered camera does not record all video. It stores AI-detected event clips internally when AI Detection is enabled and supports manual capture/recording to the phone. Clips are saved in HQ 2.5K; oldest clips are deleted when storage is full. Audio is included only when the microphone is enabled.
During Live View, enable the microphone to speak through the camera and enable the speaker to hear sound near the camera.
Choose supported detection objects, create detection zones, configure directional Line Crossing Detection and adjust sensitivity. Detected events can generate push notifications and saved clips.
Mask up to four areas in black. The selected areas are hidden in both Live View and recorded video.
Infrared illumination supports streaming and recorded video in low light. Auto switches between color and black-and-white; Color and Black-and-White keep the selected mode fixed.
Use LG ThinQ to sound the camera's Siren as a deterrent or nearby warning. Available durations are 15, 30, 45, or 60 seconds.
Supports 2.4 GHz and 5 GHz Wi-Fi. Confirm adequate signal at the installation location. Thick walls and metal obstacles can reduce performance. Add a Wi-Fi extender or mesh system if needed.
Check that the status LED is on, the camera and cable are fully connected and the supplied Power Adapter works. Use only the supplied adapter; incompatible adapters may cause overheating, fire, shock or loss of water resistance. Adapter input: AC 100–240 V, 50–60 Hz, 0.6 A max. Output: DC 5.3 V/3.3 A (17.5 W), USB-C.
A flashing green-and-blue or flashing blue LED may indicate a connection problem. Confirm the router works with another device, restart the router and camera, reduce the distance and obstructions, and add a Wi-Fi extender if needed. In LG ThinQ, review or change the network under Product Settings > Network Change. Contact support if the app or server cannot connect.
Check network quality, confirm the camera is within its specified operating temperature, and reposition it to avoid direct glare. If distortion or a persistent white/black screen remains, power-cycle or reset the camera. Contact Customer Support if the issue continues.
Confirm Night Recording Mode is set to Auto. Make sure the light sensor and IR lights are clean and unobstructed. In black-and-white mode, the IR lights should show a faint red glow. Contact Customer Support if mode switching or IR illumination does not operate.
Loosen the bottom angle-locking screw with the supplied wrench, pull the camera fully forward, adjust it 0–55° downward and tighten the screw. Remove debris from the joint.
IP65 protection depends on correct installation. Disconnect the adapter before handling. If water entered between the wall and bracket, seal the entry path; damage caused by an uneven wall is not covered. Replace damaged parts. If the power connection became wet, remove the camera, dry all parts completely, seal the Mounting Plate with the waterproof sheet and appropriate sealant, then reinstall. Contact service if damage is suspected.
Disconnect power, remove the locking screw, rotate the product counterclockwise off the Mounting Plate, reconnect USB-C power, and hold the Option Button for 10–20 seconds. After reset, set up the product again in Apple Home or LG ThinQ.
Follow all applicable national and local privacy and recording laws. You may need to notify visitors or other people and obtain separate consent for audio recording.
Confirm the Mounting Plate and screws remain secure and check for gaps or possible moisture-entry paths. Periodically inspect the lens, wiring and metal parts for dirt, damage or corrosion.
Confirm a standard 4-inch round junction box, AC power, Ground wiring, adequate Wi-Fi and a compatible smartphone app. Additional electrical work may be required if these conditions are not met.
No. Install only on a standard 4-inch round, UL-listed weatherproof outdoor electrical junction box. Other surfaces or box sizes will not align with the Mounting Plate. If a suitable box is not present, have one installed first. Use a qualified electrician if you are not experienced with electrical wiring.
AC 100–240 V with Live, Neutral and Ground wiring is required. Rated power consumption is 42.5 W.
The product is designed for DIY installation, but it requires connection to an existing outdoor AC lighting circuit. If you are not experienced with electrical work, use a qualified electrician. Switch off the breaker and confirm the required 4-inch junction box and Live, Neutral and Ground wires before starting.
For best detection, install 7–10 ft (2.1–3 m) above the ground. Lower installation may reduce detection distance and coverage.
Install it upright on a vertical wall. Other orientations may reduce floodlight performance.
Recommended locations include entrances, garages, driveways, and yards. For best detection performance, install the camera 7–10 ft (2.1–3 m) above the ground. A standard 4-inch round, UL-listed weatherproof junction box with outdoor wiring is required. Do not point the camera directly at the sun or another strong light source, as this may damage the image sensor or reduce image quality. When possible, install the camera under an eave or other weather cover to reduce exposure to direct sunlight and rain.
Yes. Complete app setup before final attachment to the junction box, because NFC tagging and button access may be difficult afterward.
Operating temperature: -4–122 °F (-20 – 50 °C). Operating humidity: 0–90%.
Turn on Bluetooth and connect the phone to a stable Wi-Fi network. In LG ThinQ, tap + > Add Product and select the device. Confirm that the device is installed and powered on, then follow the on-screen instructions to tap the phone near the device’s NFC symbol. If NFC is not available, select Add without NFC and enter the Wi-Fi network password. Press and hold the Option Button for at least 3 seconds to enter pairing mode, then wait for the app to complete setup.
Check that the phone has a stable Wi-Fi connection and move the router and product closer together. Restart both if needed. Confirm the product is powered and in setup mode. For NFC, enable tag reading and remove thick or metal phone cases or choose Add without NFC. Reduce wireless interference, make sure LG ThinQ is up to date, then restart or reinstall the app. If you still can't complete setup, contact Customer Support.
For Unpowered NFC, hold the top of the iPhone near the NFC symbol, tap Set Up, and assign a room and name. If the product is not powered, connect power and wait for automatic detection. For manual setup, enable Bluetooth and Wi-Fi, put the product in pairing mode, tap + > Add Accessory, then scan the QR code, use NFC, select a nearby accessory or enter the 8-digit setup code. Follow the prompts to finish room, name, and recording options.
Make sure Bluetooth, Location Services and Home in iCloud are enabled. Update iOS, then restart the Home app, your devices and router. Disable any VPN and remove duplicate registrations. Make sure the product isn't already linked to another Apple ID, then verify the Home, QR code and setup code. If the issue continues, update the firmware or try another iPhone or iPad.
For reliable performance, use iOS 15.0 or later or Android 10.0 or later.
This product supports 2.4 GHz and 5 GHz Wi-Fi (IEEE 802.11 b/g/n/ac). Use WPA2 or WPA3 encryption.
No. Networks that require a web sign-in, such as those in hotels, cafés and airports, are not supported.
A compatible hub such as HomePod, HomePod mini or Apple TV 4K with tvOS 16.1 or later enables remote control, real-time notifications and automations.
Hold the iPhone's NFC antenna near the product's NFC symbol. When the accessory card appears, tap Set Up and assign a room and name. If the product is not powered, it will be added automatically after power is connected.
Yes. Turn on Bluetooth and connect the iPhone to Wi-Fi, then select Add Accessory. You can scan the QR code, tap the NFC area, select a nearby accessory or enter the setup code.
Open the app and tap the camera to view live video at up to 2.5K resolution. Streaming quality adjusts automatically based on internet conditions and cannot be changed manually.
The continuously powered camera does not record all video. It saves AI-detected event clips to internal eMMC storage when AI Detection is enabled, and it supports manual capture/recording to the phone. Event clips include approximately 4–8 seconds before and 2–6 seconds after detection, up to 10 minutes per clip, in HQ 2.5K. Approximate total storage is 16 hours for indoor/outdoor cameras and 10 hours for the doorbell; oldest clips are deleted when full. Audio is included only when the device microphone is enabled.
During Live View, enable the microphone to speak through the camera and enable the speaker to hear sound near the camera.
Choose the supported detection objects—person, animal or vehicle—then create detection zones and assign objects by zone. You can also configure directional Line Crossing Detection and adjust sensitivity for each object. Detected events can generate push notifications and saved video clips.
Mask up to four areas in black. The selected areas are hidden in both Live View and recorded video.
Infrared illumination supports streaming and recorded video in low light. Auto switches between color and black-and-white based on ambient light; Color and Black-and-White keep the selected mode fixed.
The two floodlights improve visibility and image clarity outdoors. Adjust the physical angle manually, choose one of five brightness levels and set the lights to turn on after AI detection or on a schedule.
Use LG ThinQ to sound the camera's Siren as a deterrent or nearby warning. Available durations are 15, 30, 45, or 60 seconds.
Supports 2.4 GHz and 5 GHz Wi-Fi. Confirm adequate signal at the installation location. Thick walls and metal obstacles may cause interrupted video, unstable connections or delayed alerts. Add a Wi-Fi extender or mesh system if needed.
Stop using the product immediately. Check for issues with power connections, leakage current, potential moisture inside the junction box, damaged wiring and circuit load. The issue may be caused by condensation or inadequate weather sealing. Do not resume use until the installation has been inspected or professionally serviced.
In LG ThinQ, open Floodlight Settings and choose brightness level 1–5 (default 2). Clean a dirty lens with a soft cloth. If the two lights differ significantly in brightness or one does not operate, contact Customer Support.
Confirm Live, Neutral and Ground are connected to the matching L, N, and G terminals and fully inserted. Confirm the camera body is aligned with and locked onto the Mounting Plate, then tighten the Locking Screw. Verify the supply is AC 100–240 V and can support at least 42.5 W.
A flashing green-and-blue or flashing blue LED may indicate a connection problem. Confirm the router works with another device, restart the router and camera, reduce the distance and obstructions, and add a Wi-Fi extender if needed. In LG ThinQ, review or change the network under Product Settings > Network Change. Contact support if the app or server cannot connect.
Check network quality if loading is slow or image quality is poor. Use the camera only within its specified operating temperature. Reposition it to avoid direct glare. If lines, distortion or a persistent white/black screen remains, power-cycle or reset the camera. If the issue continues, contact Customer Support.
Confirm Night Recording Mode is set to Auto in LG ThinQ. If mode switching fails, make sure the light sensor is clean and unobstructed. Cover the light sensor without covering the lens to test it. In black-and-white mode, confirm the IR lights show a faint red glow and are not blocked. Contact Customer Support if the IR lights or mode switching do not operate.
Loosen the bottom angle-locking screw with the supplied wrench. Pull the camera fully forward, adjust it 0–55° downward, then tighten the screw. Remove debris from the joint. Each Floodlight adjusts without a locking screw: 25° left/right, 30° up and 80° down.
IP65 protection depends on correct installation with a standard 4-inch round weatherproof junction box. Switch off the breaker, remove the camera, dry the camera connection and bracket completely in a ventilated area, and test with a USB supply rated 5 V/2 A or higher. Before reinstalling, seal and fully dry any water-entry path around the Mounting Plate or junction box. Use qualified service if damage is suspected.
Switch off the breaker, remove the locking screw, rotate the product counterclockwise off the Mounting Plate, and power it with a personal USB-C charger rated 5 V/2 A or higher. Hold the Option Button for 10–20 seconds. The product returns to factory defaults.
Stop using the product immediately and have the wiring, leakage current, junction-box moisture, damaged wiring, and circuit load inspected. Do not resume use until the installation has been checked or professionally serviced.
Follow all applicable national and local privacy and recording laws. You may need to notify visitors or other people and obtain separate consent for audio recording.
Confirm that the Mounting Plate, screws and junction box remain secure and that there are no gaps or possible moisture-entry paths. Periodically inspect the lens, wiring and metal parts for dirt, damage or corrosion.
See the package-contents section for all included thermostat, mounting, wiring-label and trim components.
Use the 24 VAC supply from the HVAC system. Connecting 120 VAC or 240 VAC line voltage, or an HVAC system with 120/240 VAC output, may damage the product.
Switch off power to the HVAC system before installation. Although the control circuit is 24 VAC, shorting terminals while energized may damage the HVAC system.
1) Switch off power to the HVAC/furnace/boiler. 2) Photograph and label the existing wires by terminal (R, W, Y, G, C, etc.). 3) Install the Base Plate. 4) Connect C first, then G/Y/W and R last. 5) Attach the thermostat, restore power at the breaker, and test operation.
Level the Base Plate and mark the holes. Route the wires through the center opening, fasten the plate with screws, and gently confirm it does not move.
Use the Trim Plate to cover unpainted areas, marks or discoloration left by the previous thermostat and to create a clean, flush finish around the new thermostat.
Purchase and install the LG Thermostat C-Wire Adapter to provide stable power when no Common Wire is available. Always switch off HVAC power before wiring; working on energized wiring may damage the thermostat or HVAC system.
Operating temperature: 32–122 °F (0–50 °C). Operating humidity: 20–80%.
For reliable performance, use iOS 15.0 or later or Android 10.0 or later.
Thick walls and metal doors can weaken Wi-Fi. If the connection is unstable, move the access point closer or consider a Wi-Fi extender.
Supports 2.4 GHz and 5 GHz Wi-Fi (IEEE 802.11 b/g/n/ac). Use WPA2 or WPA3 encryption.
A compatible hub is required for remote control when you are away from home. Apple HomeKit and LG ThinQ may provide additional features, including Celsius/Fahrenheit selection and LCD brightness control.
Follow the app prompts to identify the connected HVAC equipment, verify wiring terminals, select temperature units and test heating, cooling and fan operation.
Hold the iPhone's NFC antenna near the product's NFC symbol. When the accessory card appears, tap Set Up and assign a room and name. If the thermostat is not powered, it will be added automatically after power is connected.
Yes. Turn on Bluetooth and connect the iPhone to Wi-Fi, then choose Add Accessory. Scan the QR code, tap the NFC area, select a nearby accessory, or enter the passcode.
Select Add Product (+) and confirm the thermostat is powered. Tap the phone near the NFC area, or choose Add without NFC and enter the Wi-Fi password. Hold the Option Button for at least 3 seconds to enter Bluetooth pairing mode, then follow the app.
NFC antenna locations vary by phone. Move the top or center of the phone near the NFC label, remove thick or metal cases, and try again.
Use Factory Reset if restarting does not resolve an issue or before transferring the product. It deletes HVAC connection information and user settings.
Hold the bottom Option Button for at least 3 seconds and release it. In Select Menu, choose Factory Reset and press the O button. When prompted to reset all settings, choose OK and press O. The product restarts and returns to initial setup.
Hold the Option Button for at least 3 seconds, choose Pairing Reset, and press O. If a device is paired, confirm Reset Pairing and pair again after restart. If none is paired, Bring phone near appears so you can begin setup.
Most Matter platforms support setup and basic control. Additional extension features are available only in Apple Home and LG ThinQ; SmartThings, Alexa and Google Home primarily support standard Matter functions. Set up the thermostat in Apple Home or LG ThinQ first, then share it with other Matter platforms using Matter Multi-Admin.
Adjust thermostat brightness to one of three levels in the app. The built-in Ambient Light Sensor also switches to Night Mode and adjusts brightness automatically when the room is dark.
A radar sensor detects approach. At approximately 14.8 ft (4.5 m), Distance View turns on. Within approximately 3.3 ft (1 m), the LCD and button lighting turn on together.
Use the left and right buttons to adjust temperature and move through menus. Use the bottom button to navigate and select items.
Firmware updates may improve performance, correct issues or add features. Do not disconnect power during an update. If an update fails, the product automatically returns to the previous version. Downgrades are not supported.
No. Do not open or disassemble the product. It contains no user-serviceable parts and may present an electric-shock hazard.
Damage or failure caused by incorrect current or voltage, improper installation, adjustment or operation, misuse, unauthorized repair or improper maintenance may not be covered. The customer is responsible for product damage and property loss caused by negligence.
The thermostat is designed and reliability-tested for normal temperature and humidity changes, including condensation. If heavy moisture enters the product or condensation persists, allow it to dry completely before use. Request service if symptoms continue.
See the package-contents section for the sensor, CR2477 battery, mounting plate and related materials.
Open the bottom cover and remove the battery insulation tab. Confirm the status LED flashes green, close the cover, and add the Matter accessory in LG ThinQ or Apple Home. If setup is not completed within 3 minutes of first power-on, open the cover, press the button once, and try again.
Use one CR2477 3 V lithium coin cell (24.5 mm diameter, 7.7 mm thick). Insert it with the + side facing outward and confirm it is seated before closing the cover. Follow the polarity markings; the holder is designed to help prevent reverse insertion.
The battery cover includes a magnet for attachment to steel surfaces. On a nonmetal wall, first attach the supplied Mounting Plate, then magnetically attach or remove the sensor.
Operating temperature: 14–122 °F (-10–50 °C). Operating humidity: 0–95%.
For reliable performance, use iOS 15.0 or later or Android 10.0 or later.
No. The LG Temperature and Humidity Sensor uses Thread, which is designed for stable connectivity and low battery consumption.
Thick walls and metal doors can weaken wireless signals. Move the sensor closer to the hub or add a Thread Router. Thread and Wi-Fi share the 2.4 GHz band; avoid adjacent Wi-Fi and Thread channels where possible to reduce interference.
A compatible hub with a Thread Border Router is required for remote control when you are away from home. Look for the applicable Thread Border Router compatibility logo.
Hold the iPhone's NFC antenna near the sensor's NFC symbol. When the accessory card appears, tap Set Up and assign a room and name. The sensor is added automatically after it is powered.
Yes. Turn on Bluetooth and connect to Wi-Fi, then choose Add Accessory. Scan the QR code, tap the NFC area, select a nearby accessory, or enter the passcode. The LED must be flashing green; if it is off, reinsert the battery or briefly press the Option Button.
Select Add Product (+), then use NFC, scan the QR code, select a nearby accessory, or enter the passcode. The LED must be flashing green; if it is off, reinsert the battery or briefly press the Option Button.
NFC antenna locations vary by phone. Move the top or center of the phone near the NFC label, remove thick or metal cases, and try again.
Use Factory Reset if restarting does not resolve an issue or before transferring the product to another user.
Remove the battery cover, hold the bottom button for at least 3 seconds, and release it. When the status LED turns green, set up the sensor again.
Most Matter platforms support setup and basic control. Additional extension features are available only in Apple Home and LG ThinQ; SmartThings, Alexa, and Google Home primarily support standard Matter functions.
The LED indicates power-on, setup standby, connecting, connection complete or failed, Factory Reset and critical alerts. Remove the battery cover to see it. See the manual for the color guide.
Yes. The Device LED indicates battery and connection status. Remove the battery cover to see it, and refer to the manual for detailed color meanings.
Move the sensor away from direct sunlight and nearby heat sources, such as a TV or computer. These conditions can affect ambient-temperature readings.
Firmware updates may improve performance, correct issues, or add features. Do not remove the battery during an update. If an update fails, the product automatically returns to the previous version. Downgrades are not supported.
A low-battery alert appears in the app when the level reaches 10% or below. After replacing the battery, the sensor may take a few moments to reconnect automatically to Apple Home, LG ThinQ or other connected services.
No. Do not open or disassemble the product beyond the battery compartment. It contains no user-serviceable parts.
Damage or failure caused by an incorrect battery, improper installation, adjustment or operation, misuse, unauthorized repair or improper maintenance may not be covered. The customer is responsible for product damage and property loss caused by negligence.
Turn off your system breaker, remove your thermostat faceplate and check if a wire is attached to the 'C' terminal slot.
Check your furnace control board to confirm that this exact same wire color is stripped and connected to the 'C' terminal at the source before plugging it into your Thermostat.
No, wire coloring is entirely up to the discretion of the original installer; always verify the connections directly at your HVAC equipment's control board.
No, LG discourages using third-party 24V AC wall transformers because unregulated power delivery can permanently damage the internal logic board.
It is LG's C-wire substitute that installs inside your furnace, air handler or zone controller instead of requiring you to pull new wires through your walls.
Yes, but you must install a separate LG C Wire Adapter Connector at the zone controller panel for every individual LG thermostat you are using.
Yes, you can run a standard 18/5 (5-wire) thermostat cable from your HVAC system to your thermostat wall plate to gain a native C wire.
Yes, always shut off the main breaker switches to your heating and cooling equipment to prevent blowing an internal low-voltage fuse.
Without a constant power source, the LG Thermostat cuts off its power-heavy Wi-Fi chip to prioritize basic temperature regulation when its internal battery drops too low.
Yes, the LG Thermostat will continue to run your scheduled routines locally on the wall unit, but you will lose remote app access and smart integrations.
Gently remove the display from the wall and replace standard batteries.
Yes, stable bluetooth and Wi-Fi connections to remote room sensors are frequently dropped when the thermostat enters a low-power saving mode.
Occasionally, but power delivery issues will almost always be accompanied by low battery voltage readings or system help codes in the app.
Yes, a dedicated common wire keeps the Wi-Fi radio fully awake and ready to instantly process changes from your Apple Home app.
No, it does not change the algorithms, but it ensures your thermostat never skips a scheduled shift due to an unexpected power deficit.
Yes, a C wire stops the thermostat from pulsing current through your heating or cooling relays, completely eliminating physical chattering and short-cycling.
The sensor works independently, but a stable power supply ensures humidity data and automated dehumidifier relays are reported consistently without lag.
Yes, if your model supports Farsight or wake-on-approach, these sensors are often throttled or shut down entirely when the system detects power starvation.
Yes, it provides identical power stability, allowing all premium software features and screen settings to run at maximum performance.
High-voltage systems (110V AC 240V AC baseboard heaters), millivolt systems (wall fireplaces) and proprietary digital communicating systems are strictly incompatible.
Yes, over time, a thermostat continuously pulsing current to 'steal' power can overheat sensitive control boards or cause premature failures in your HVAC components.
Images may be simulated and dramatized for illustrative purposes. Actual features, functionality, and other product specifications may differ and are subject to change without notice. Prices, promotions, and availability may vary by model, store, and online. Prices subject to change without notice. Quantities are limited. Check with your local retailers for their final price and availability.
- TV & Home Theater
- My Account
- About LG
- Offers
- Articles & Gift Guides
Social Support
 Copyright © 2009-2026 LG Electronics. All Rights Reserved