How to Use

For more detailed information, please refer to the product manual for your model.

Filling the Water Tank
STEP 1

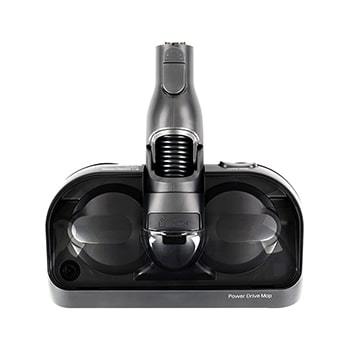
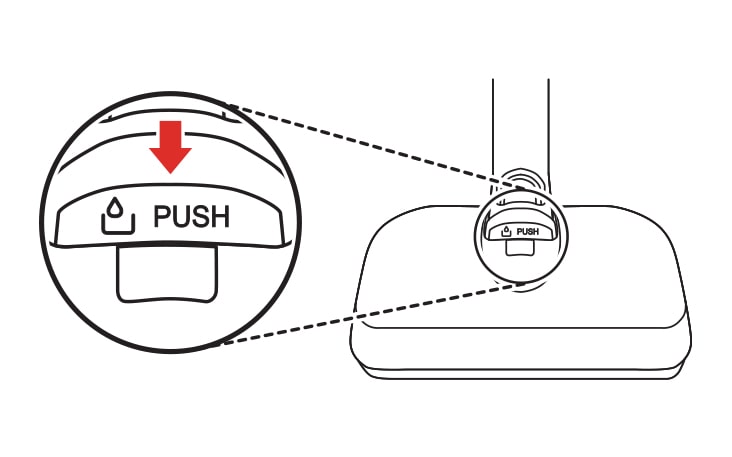
Press the PUSH button to remove the water tank from the mop nozzle.

Press the PUSH button to remove the water tank from the mop nozzle

STEP 2

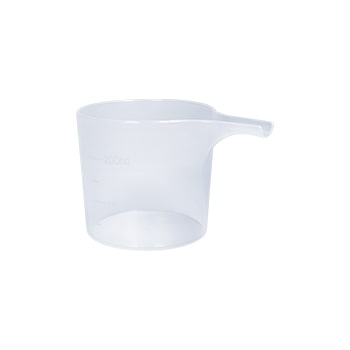
Open the water inlet cap on the side of the water tank and fill the tank with water using the measuring cup.


- Open only one water inlet cap to fill the water. 

Opening both caps may cause the water to flush.

- Do not fill the tank over the MAX line.

- Do not put liquid other than water and hot water in the water tank.

Open the water inlet cap on the side of the water tank and fill the tank with water using the measuring cup  Open only one water inlet cap to fill the water  Opening both caps may cause the water to flush Do not fill the tank over the MAX line Do not put liquid other than water and hot water in the water tank

STEP 3

Close the water inlet cap tightly.


- If the water inlet cap is not closed properly, water may leak.

Close the water inlet cap tightly  If the water inlet cap is not closed properly water may leak

STEP 4

Attach the water tank to the mop nozzle again.


- Insert the 2 tabs at the front of the water tank into the slots on the top of the mop nozzle. 

Press down at the centre to lock the tank in place.

Attach the water tank to the mop nozzle again  Insert the 2 tabs at the front of the water tank into the slots on the top of the mop nozzle  Press down at the centre to lock the tank in place

STEP 5

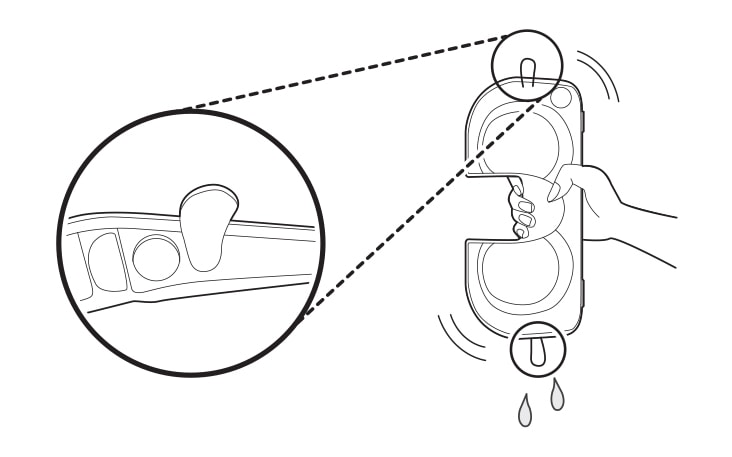
Open the 2 water inlet caps on the side of the water tank and empty the water tank.

Shake the water tank to remove the remaining water.

Open the 2 water inlet caps on the side of the water tank and empty the water tank Shake the water tank to remove the remaining water

STEP 6

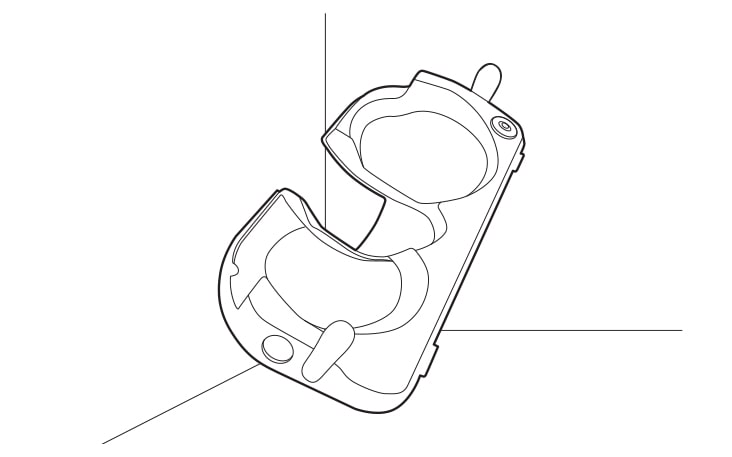
Leave the 2 water inlet caps open and allow the water tank to dry in a well-ventilated area out of direct sunlight for at least 24 hours.


- Keep the water tank after water is completely empty and dry. 

Moisture or residual water in the tank may cause odour.

Leave the 2 water inlet caps open and allow the water tank to dry in a well ventilated area out of direct sunlight for at least 24 hours  Keep the water tank after water is completely empty and dry  Moisture or residual water in the tank may cause odour

Attaching the Mop Pads
STEP 1

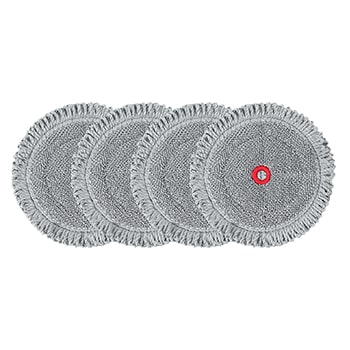
Wet both sides of the mop pads with water then squeeze out any excess water before attaching the pads.


- Do not attach pads while they are dripping wet.

- Attaching and using mop pads while they are dry may affect the cleaning results.

Wet both sides of the mop pads with water then squeeze out any excess water before attaching the pads  Do not attach pads while they are dripping wet Attaching and using mop pads while they are dry may affect the cleaning results

STEP 2

Place the mop nozzle upside down on the floor.

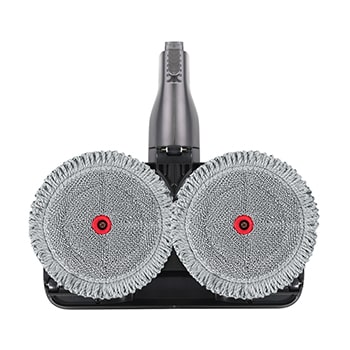
Align and attach the centre of the mop pad with the centre of the mop attachment plate.


- Attach the Velcro on the mop pad to the mop plate. 

Attaching the mop pad upside down or improperly may affect the cleaning results.


Attach the mop nozzle to the appliance.

Place the mop nozzle upside down on the floor Align and attach the centre of the mop pad with the centre of the mop attachment plate  Attach the Velcro on the mop pad to the mop plate Attaching the mop pad upside down or improperly may affect the cleaning results  Attach the mop nozzle to the appliance

Storing the Mop Pads

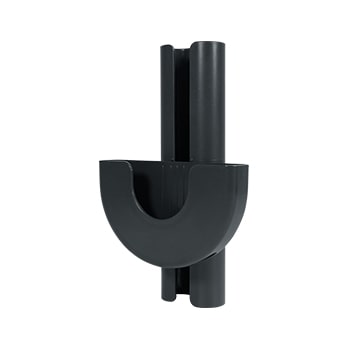
Up to 2 mop pads can be stored in the detachable mop pads storage.


- Store the mop pads completely in a dry state.

Otherwise, it can result in an unpleasant odour.

Up to 2 mop pads can be stored in the detachable mop pads storage Store the mop pads completely in a dry state Otherwise it can result in an unpleasant odour.

How to Clean

For more detailed information, please refer to the product manual for your model. 

Cleaning the Mop Nozzle

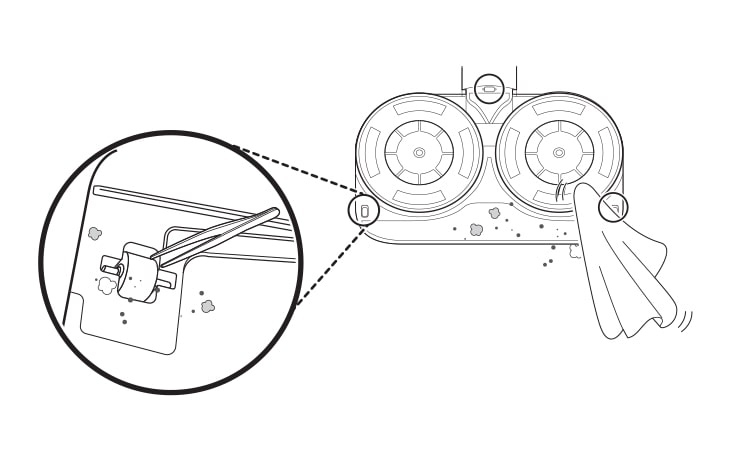
Press the nozzle release button to remove the mop nozzle from the extension pipe and turn the nozzle upside down.


Use a damp towel or cloth to remove any remaining foreign objects and dust from the bottom of the mop nozzle. 

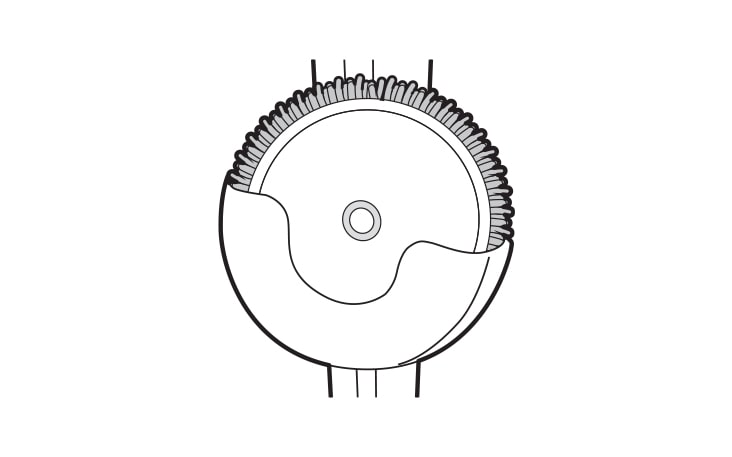
Remove foreign objects, debris and hair from all Rollers of the nozzles using tweezers.

Press the nozzle release button to remove the mop nozzle from the extension pipe and turn the nozzle upside down  Use a damp towel or cloth to remove any remaining foreign objects and dust from the bottom of the mop nozzle  Remove foreign objects debris and hair from all Rollers of the nozzles using tweezers

After Cleaning the Mop Nozzle

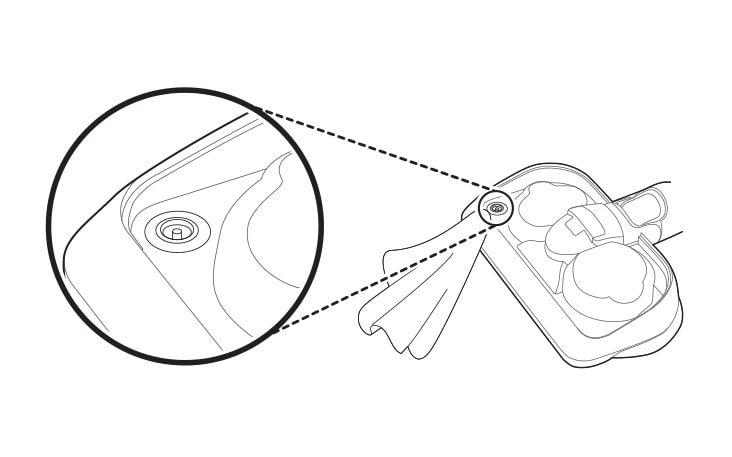
After cleaning, wipe off any remaining water on the water supply inlet on the mop nozzle with a soft cloth.

The water could drip onto the floor and damage it.


- Do not pull or stretch the rubber gasket on the water supply inlet. 

Doing so may tear or damage it.

After cleaning wipe off any remaining water on the water supply inlet on the mop nozzle with a soft cloth The water could drip onto the floor and damage it  Do not pull or stretch the rubber gasket on the water supply inlet Doing so may tear or damage it

Drying the Mop Pads

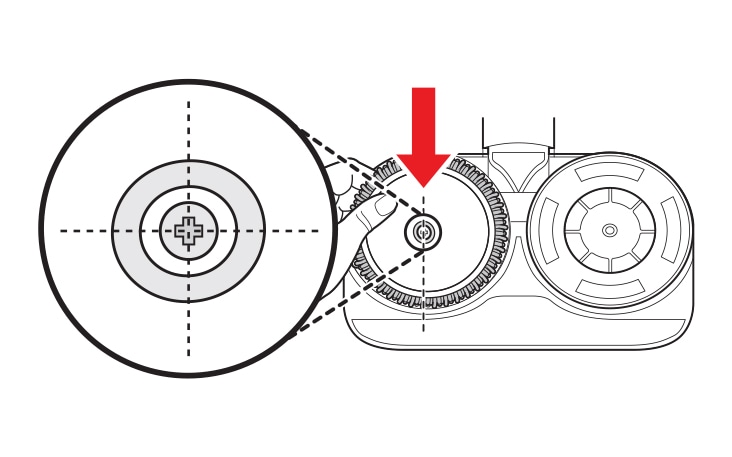
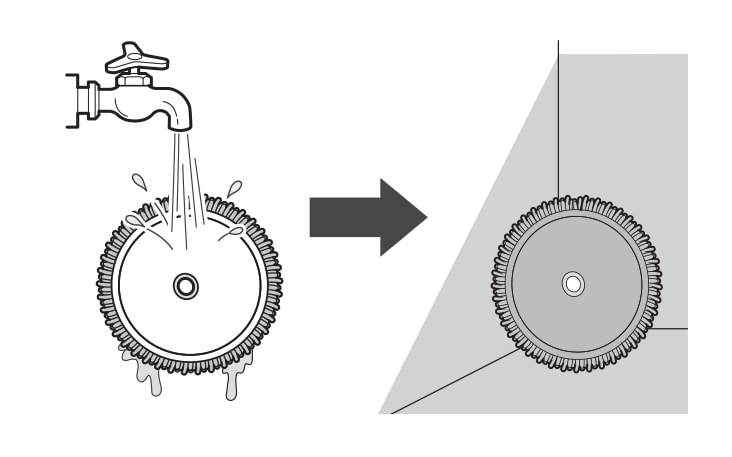
1. Separate the mop pads from the mop attachment plate.

2. Hand wash the pads with a neutral detergent.


- Do not use bleach or fabric softener when washing the mop pads.

- Do not dry the pads in a clothes dryer.

- Do not boil the mop pad.

- Storing mop pads in a damp state can result in an unpleasant odour. 

Set the pads in a well-ventilated area out of direct sunlight for at least 24 hours or until completely dry.

1 Separate the mop pads from the mop attachment plate 2 Hand wash the pads with a neutral detergent  Do not use bleach or fabric softener when washing the mop pads Do not dry the pads in a clothes dryer Do not boil the mop pad Storing mop pads in a damp state can result in an unpleasant odour Set the pads in a well ventilated area out of direct sunlight for at least 24 hours or until completely dry

* Product images and features may contain advertising expressions and may differ from the actual product. Product appearance, specifications, etc. may change without prior notice for product improvement.

* All product images are photo cuts and may differ from the actual product. Product color may vary depending on monitor resolution, brightness settings, and computer specifications.

* The performance of the product may vary depending on the usage environment, and availability may vary by store.

Frequently Asked Questions

Which features does this product have?

Features vary by model. Not all features referred to in the below Q&A are available on every product in the LG range. Please refer to specifications / product pages for details by model.

Can I find replacement parts and accessories for LG Vacuum Cleaners? 

Yes, we offer a range of replacement parts and accessories across all our Vacuum Cleaners, including filters, brush rolls, and attachments. These can be purchased separately via LG website or official LG stockists.

How do I troubleshoot common issues with my LG Handstick Vacuum Cleaner?

LG provides comprehensive customer support, including troubleshooting guides in the user manual and online resources. If you encounter any issues with your Handstick Vacuum Cleaner, such as loss of suction or battery problems, refer to the troubleshooting section of the manual or contact our customer service team for assistance. 

What’s the difference between a handstick and bagless Vacuum cleaner?

Our handstick vacuum cleaners possess the features of a cordless, lightweight, and manoeuvrable vacuum cleaner designed for quick clean-ups and ease of use. On the other hand, our bagless vacuum cleaners collect dust and debris in a dirt bin or canister instead of disposable bags. The bagless vacuums tend to be larger in size, but are still an efficient and easy product to use.

Are LG Handstick Vacuum Cleaners suitable for cleaning carpets and hardwood floors?

Yes, our Handstick Vacuum Cleaners are versatile and designed to effectively clean various surfaces, including carpets, hardwood floors, tiles, and more. They come with adjustable suction power, and various nozzle types and attachments to ensure thorough cleaning on different floor types.

How do I maintain and clean my LG Handstick Vacuum Cleaner?

To maintain optimal performance, it's recommended to regularly empty the dustbin, clean the filters, and remove any hair or debris tangled around the brush roll. We also offer a number of removable and washable filters sold separately to our handstick vaccum, ensuring you always maintain your vacuum to ensure optimal clean. Refer to the user manual for specific cleaning instructions tailored to your model. 
Are LG Handstick Vacuum Cleaners cordless?

Yes, our LG Hand stick Vacuum Cleaners are cordless for your added convenience and manoeuvrability during performance. They are powered by rechargeable lithium-ion batteries, allowing you to move freely around your home without being tethered to a power outlet.

The dust emptying function isn't working. How can I fix this?

Please check the following:

  1. Make sure the power plug is connected.
  2. Check that the vacuum cleaner is properly installed. It will beep if set up correctly.
  3. If the dust stops emptying, pressing the "Start/Stop” button will restart the process.
  4. The dust-emptying mode is either automatic or manual:

-The default setting for robot vacuum cleaners is Auto mode. The default setting for stick vacuum cleaners is Manual mode.

-For Manual mode, press the Stick Empty or Robot Empty buttons while the stick or robot vacuum cleaners are docked to begin the dust emptying process.

-To switch between the Manual and Auto dust-emptying modes, press the Select Mode button for at least three seconds.

The unit has lost power. What could be causing this?

Please check whether:

  1. The power plug is fully inserted into the outlet.
  2. Any multi-outlet strip is switched on.
  3. The breaker hasn't tripped and power is available.

Why isn’t my vacuum charging?

Here are some tips:

  1. Check if the vacuum is properly installed—it will beep when placed correctly. Reinstall the vacuum if there is no beep.
  2. Make sure the auxiliary battery is fully pushed in until its icon flashes.
  3. Check that the robot vacuum has docked correctly—it beeps when in place. Also, check for debris if an error message pops up.
  4. Check that the plug is fully inside the outlet.
  5. Unplug the unit and wipe off any debris from the charging terminal with a dry cloth.
  6. Your unit may not charge if the temperature is below 5°C. Try charging again after it’s above 5°C.

What should I do if the product has a smell?

Here are some tips:

  1. New vacuums may have a "new" smell that tends to go away after about 3 months.
  2. Check for damp dust stuck on the mop nozzle, since it can create odors. Remember to remove any wet dust after each use before storing your vacuum. The pre-filter, exhaust filter, or large dust separator may also start smelling if not dried completely. After a wash with water, dry the parts thoroughly in well-ventilated shade for at least 24 hours before using them again.
  3. If you can smell the dust bag, strong odors like pet waste may have transferred to the dust bag. Replace the bag after vacuuming up strong-smelling items even if it is not full. Similarly, old dust bags that haven't been replaced in a long time may also start to smell. Replace the dust bag regularly even if it’s not full.

What does it mean if the Auto emptying and Auxiliary battery indicators flash at the same time?

A motor is not working properly. This could be caused by:

The motor that presses the dust bin cover separation button

The motor that opens and closes the dust bin cover

The motor that changes air flow between the STICK Emptying and the ROBOT Emptying modes

Please unplug the power cord and contact an LG Electronics service center.

Why does the dust emptying notification flash red for about 10 seconds followed by a beep?

The dust bag is full and needs replacing. You can purchase additional replacement dust storage bags via LG website or official LG stockists.

All Spec

FEATURES (CLEANER)

  • Type

    Vacuum

What people are saying

Our Picks for You