We use cookies, including cookies from third parties, to enhance your user experience and the effectiveness of our marketing activities. These cookies are performance, analytics and advertising cookies, please see our Privacy and Cookie policy for further information. If you agree to all of our cookies select “Accept all” or select “Cookie Settings” to see which cookies we use and choose which ones you would like to accept.
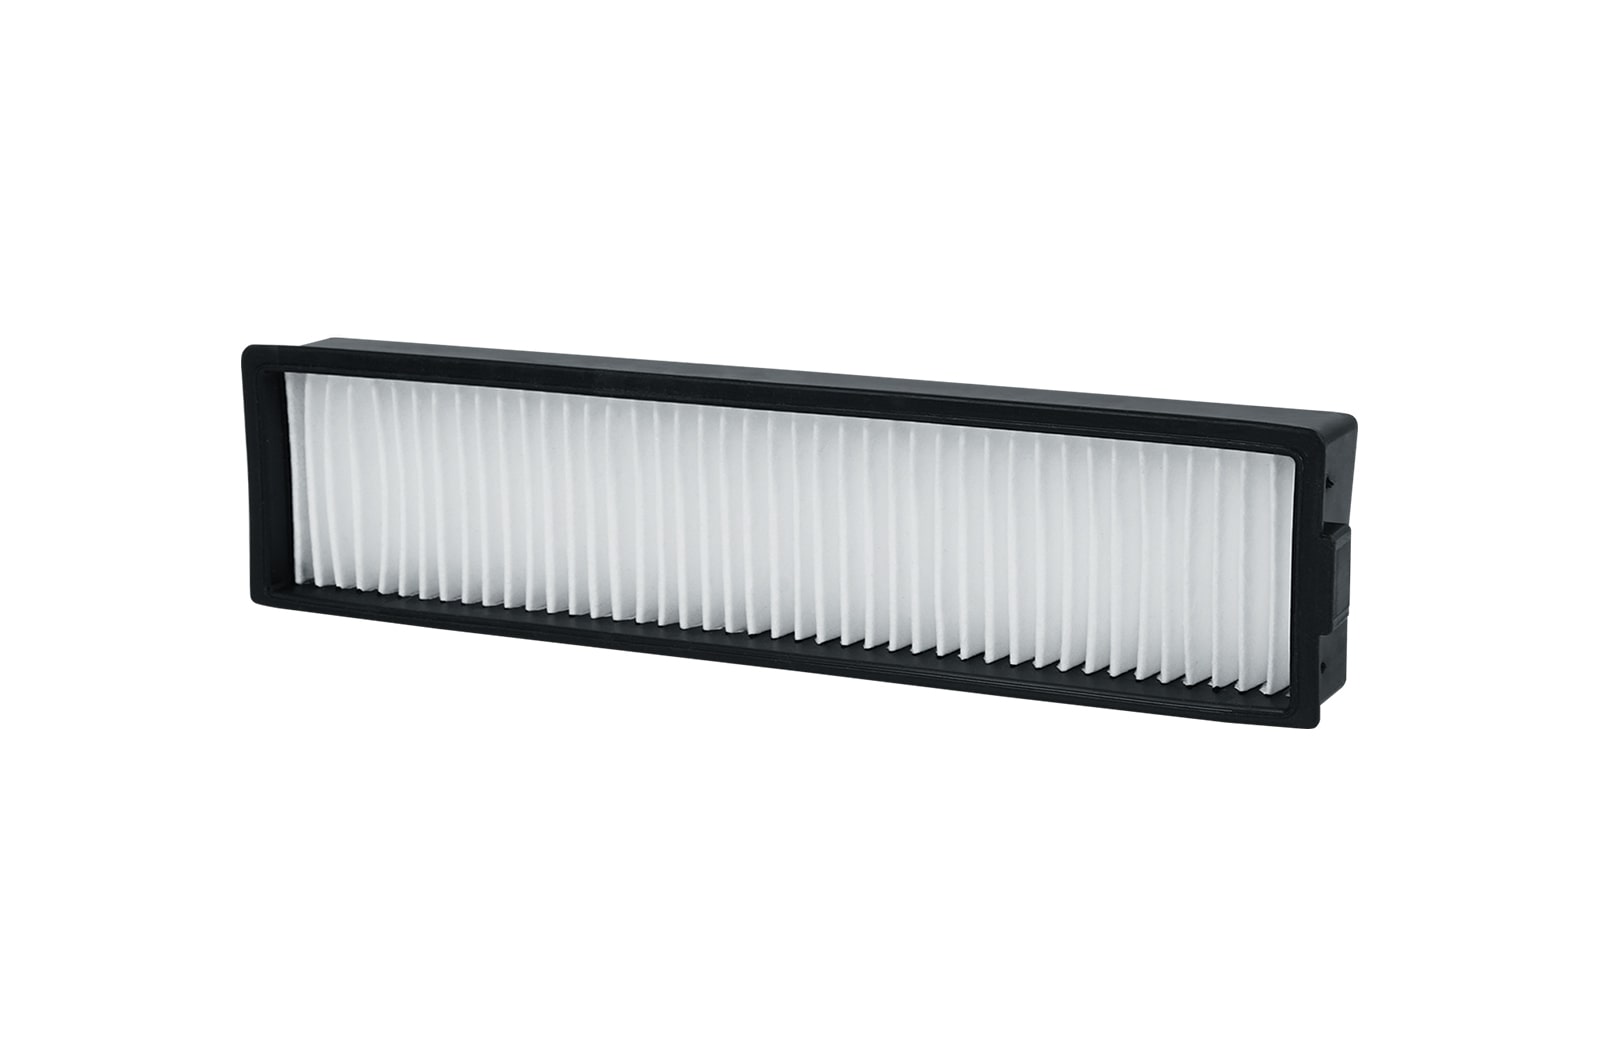
Robot Cleaner EPA Filter
Key Features
- LG Robot Cleaner Genuine EPA Filter
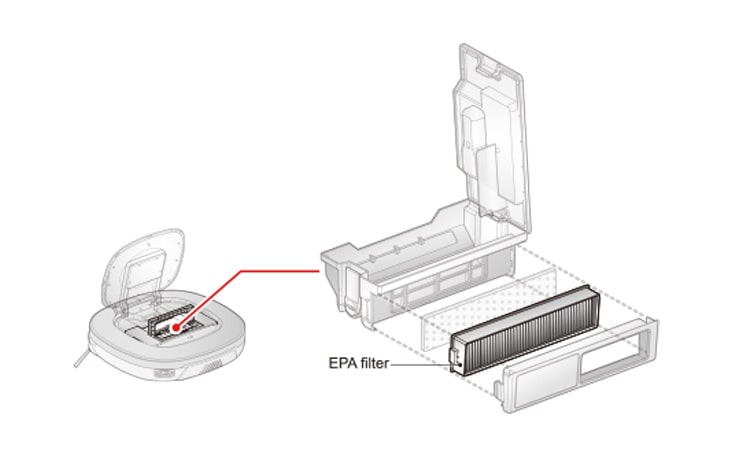
Mounting Location
The actual installation location of this item may vary depending on product model.
For more detailed information, please refer to the product manual for your model.
How to Replace
The replacement instruction for this item may differ slightly from the information below.
For more detailed information, please refer to the product manual for your model.
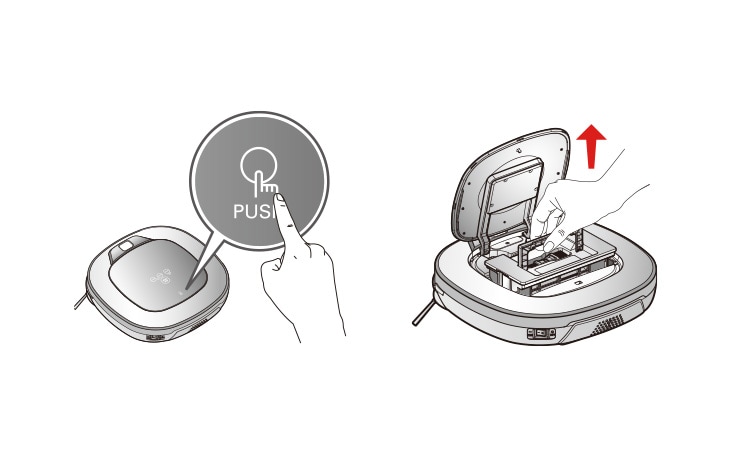
STEP 1
Open the dust bin compartment cover by pressing the PUSH button on the Robot Cleaner.
Grab the handle of the dust bin and pull it upward.
STEP 2
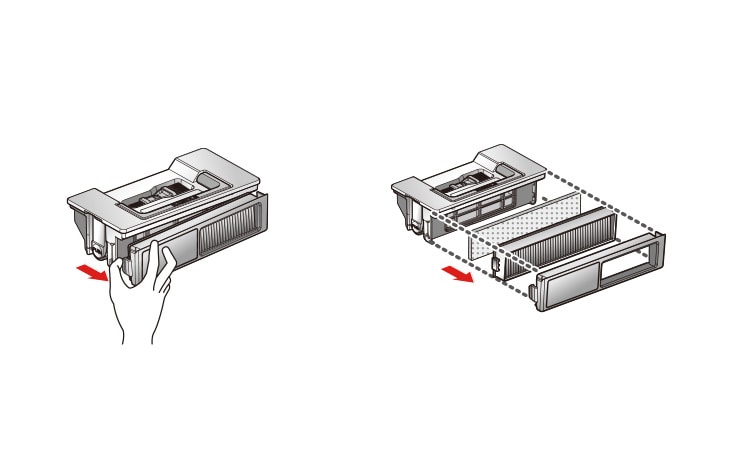
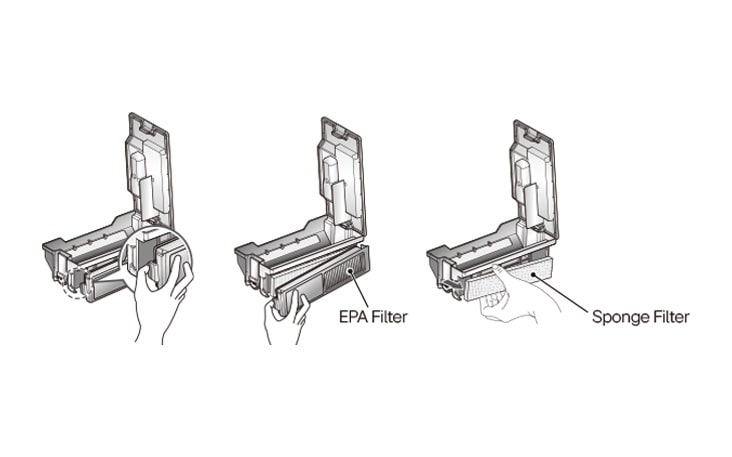
Pull the hook on the left of Filter Cover on the rear of Dust Bin to separate the filter and the sponge.
- Note that separating the filter may result in dust dropping.
STEP 3
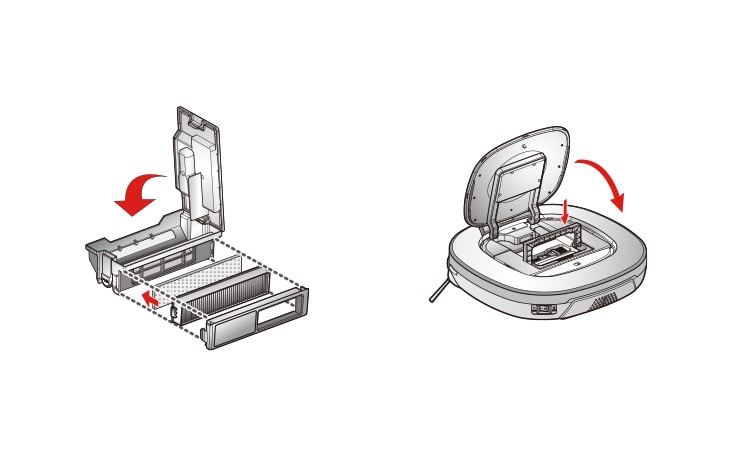
When reassembling or fitting the cleaned Dust Bin, close the lid and put in the Sponge and EPA Filter.
Put the dust bin into the Robot Cleaner and close the dust bin compartment cover.
How to Clean
For more detailed information, please refer to the product manual for your model.
STEP 1
Pull the hook on the left of the EPA Filter module on the rear side of Dust Bin to separate the EPA Filter and the sponge.
STEP 2
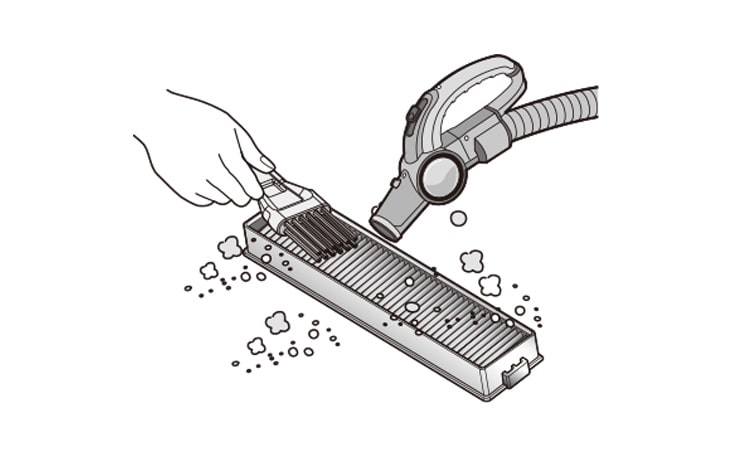
Thoroughly clean out the fine dust particles on the EPA Filter, with a vacuum cleaner or cleaning brush.
- Do NOT wash the EPA Filter with water.
Its suction power will be reduced.
STEP 3
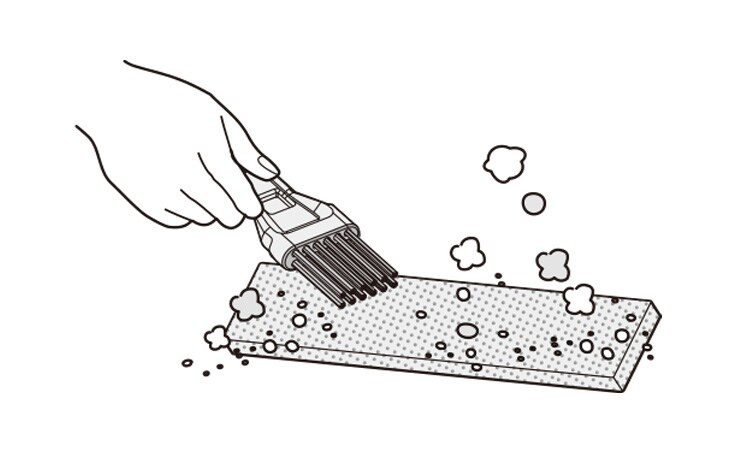
Use a cleaning brush to clean the Sponge Filter.
If using water to clean it, allow it to dry completely in the shade before refitting.
STEP 4
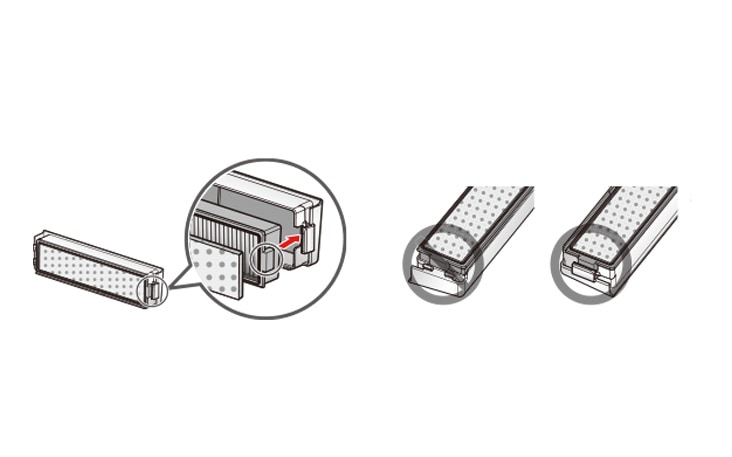
Assemble the EPA and Sponge filters back onto the Filter housing as per the following sequence.
- Fit the rectangular locator on the EPA Filter into the locating slot of the filter body.
- Be careful not to incorrectly assemble EPA and Sponge Filter onto the Filter housing.
Tip
- To preserve the performance of the Robot Cleaner, clean the EPA Filter at least once a week, with a brush or vacuum cleaner.
- The EPA and sponge filters must be fitted to the filter housing before refitting the filter to the dust bin.
- Operating the Robot cleaner without the EPA and sponge filters will cause the suction motor to malfunction.
* Product images and features may contain advertising expressions and may differ from the actual product. Product appearance, specifications, etc. may change without prior notice for product improvement.
* All product images are photo cuts and may differ from the actual product. Product color may vary depending on monitor resolution, brightness settings, and computer specifications.
* The performance of the product may vary depending on the usage environment, and availability may vary by store.
Gallery
Summary
Dimensions

All specs
GENERAL
-
Parts Number
ADV74225701
What people are saying
Find locally
Our picks for you
-
Manual& Software
Download product manuals and latest software for your product.
-
Troubleshoot
Find helpful how-to videos for your product.
-
Product Warranty
Check your product warranty information here.
-
Accessories Warranty
Check your accessories warranty information here.
-
Part & Accessory
Discover accessories for your product.
-
Product Registration
Registering your product will help you get faster support.
-
Order support
Track your order and check order FAQ.
-
Repair request
Repair request service conveniently online.
Contact Us
-
Live chat
Chat with LG Product Experts for shopping assistance, discounts and offers in real time
-
WhatsApp
Chat with LG Service Support using the most popular messenger
-
Email us
Send an Email to LG Service Support
-
Objet Platinum Care+
LG Objet premium support: priority assistance, expert help, and tailored solutions.
