Requirements:
- Windows Vista or Later (7, 8, 8.1, 10).
- The Smart Share Software for Windows.
- About 10 minutes (depending on the speed of your computer).
- A home network (router).

Step 1: Getting Started

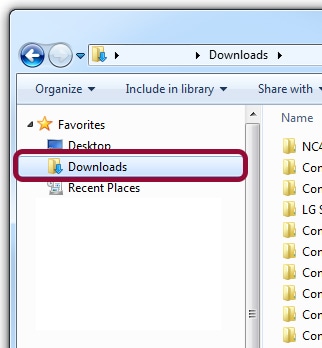
After downloading the latest version of Smart Share (see link above), locate the downloaded file either from your web browser, or from your Downloads folder (shown here).
The images below show the three most common browsers for PC users, Google Chrome, Firefox, and Internet Explorer respectively, and how to open the access the file from each.
Google Chrome
- Locate the download file in the bottom-left of the browser.
- Click the small arrow on the right-hand-side of the download item.
- Choose Show in folder.

Firefox
- When you first click the link to download the file, choose Save when prompted.
- Click the small downward facing arrow near the top-right of the browser.
- Click on the small folder icon on the right of the download item (when you hover it says Open Containing Folder).

Internet Explorer
- When you first click the link to download the file, choose Save when prompted at the bottom of the screen.
- Once the file finishes downloading, choose Open Folder in the same area at the bottom of the screen.


Once you locate the file, Right-Click it, and choose Extract All... from the menu.
Click the Extract button on the next screen, then the folder containing the extracted files should open automatically.
Step 2: Installation

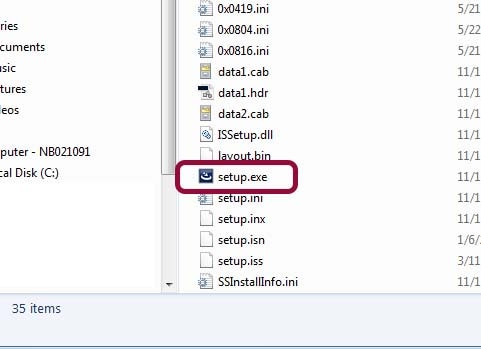
With the files extracted, and the folder they were placed in open, you should see several files arranged in alphabetical order.
Browse the list of files until you find setup.exe, then Double-Click to launch the installation.
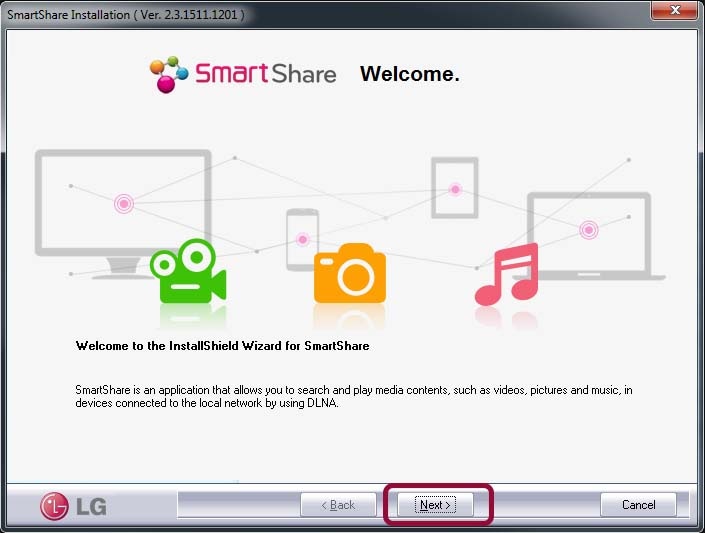
The first step is a welcome screen. Press the Next button to continue.


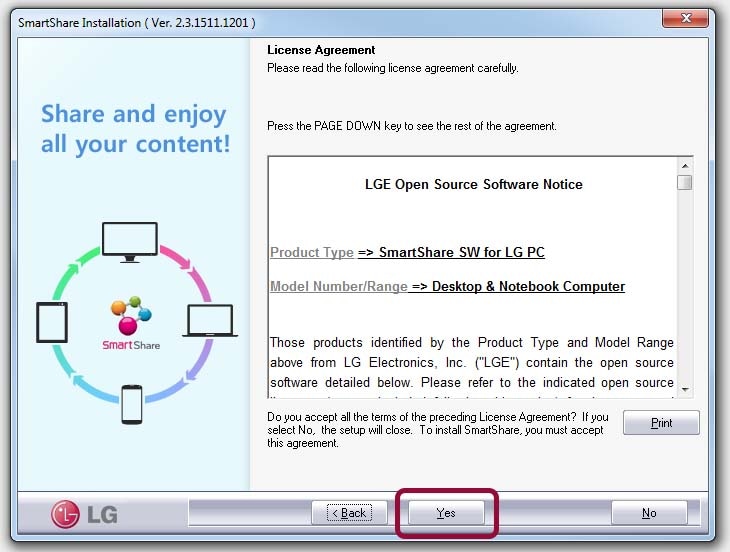
The next screen contains the Open Source Software Notice and License Agreement. You'll need to agree to these in order to continue the installation.
If you agree and wish to continue, press the Yes button.
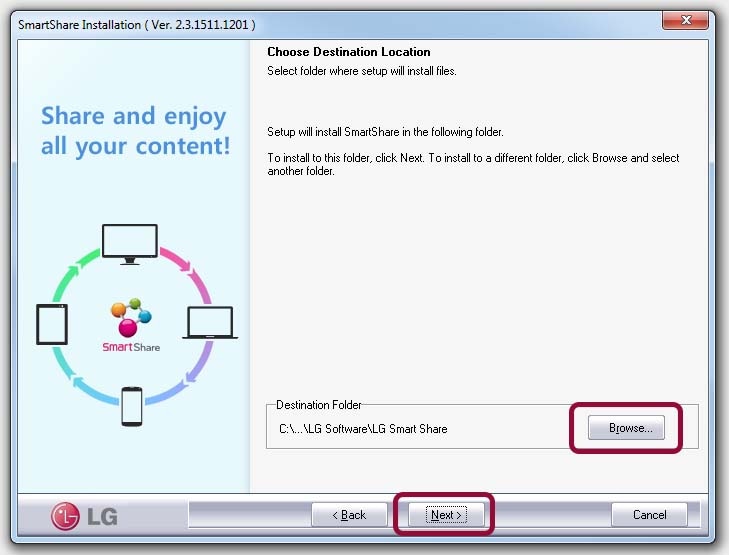
Next is the installation directory location. This is where the program files will be.
Unless you have a specific location in mind, just press the Next button to continue.


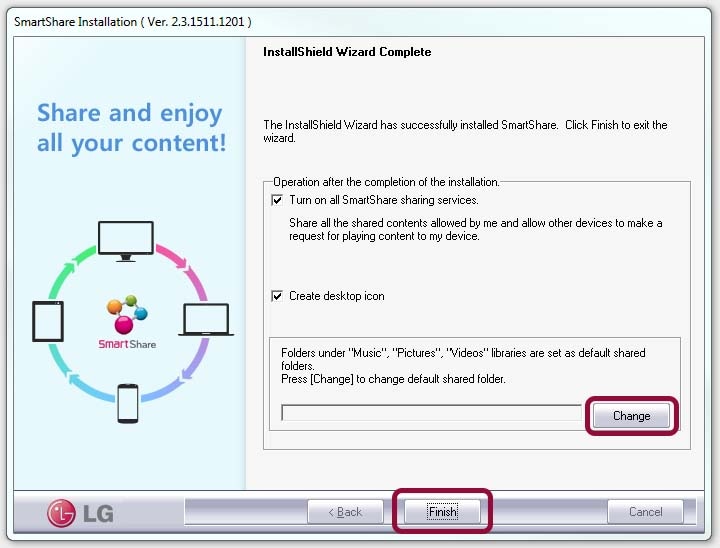
The last screen is for final settings. In general, these can remain as is.
If you have files that you want to share that are not located in the default folders (Music, Pictures, Videos), click Change to add additional shared folders.
Click the Finish button to complete the installation.
Step 3: Setup
Note: To share files using Smart Share, the PC and the TV must be on the same network, ex. Smith Family Wi-Fi.

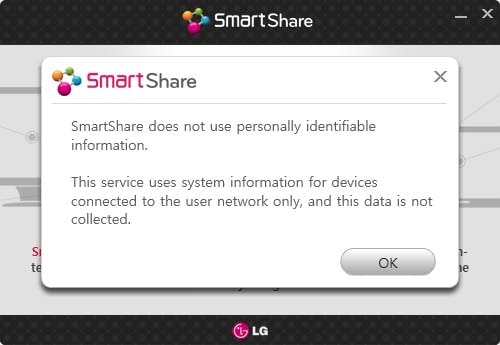
This first box is information that says we are not collecting any network information.
Click the OK button to continue.
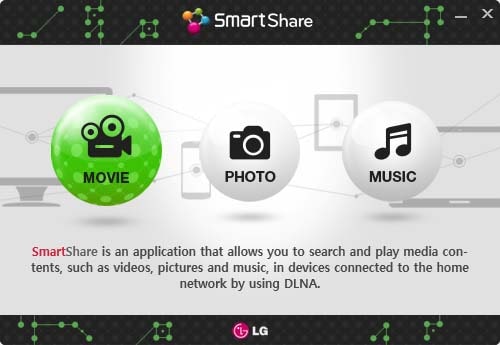
Now you'll see the screen that you will see everytime you restart the program.
This screen is more of a formality, as you can easily change the content type later.
Choose any of the three to continue.


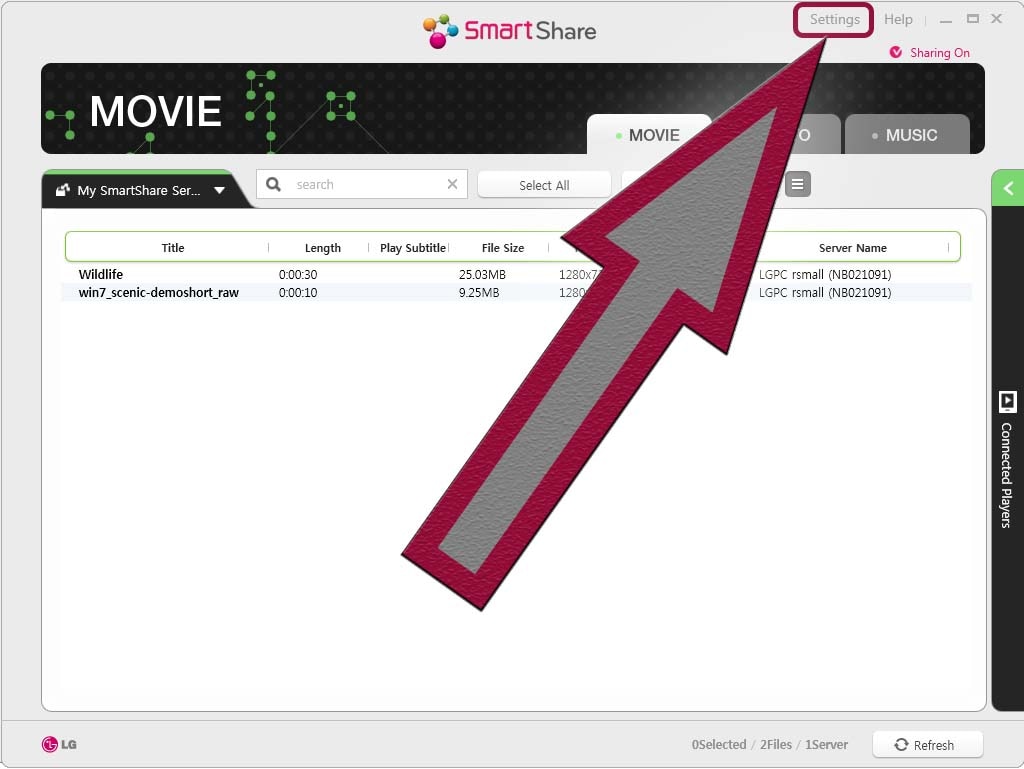
In the top-right of the Smart Share window, click Settings.
There are four types of customizable settings.
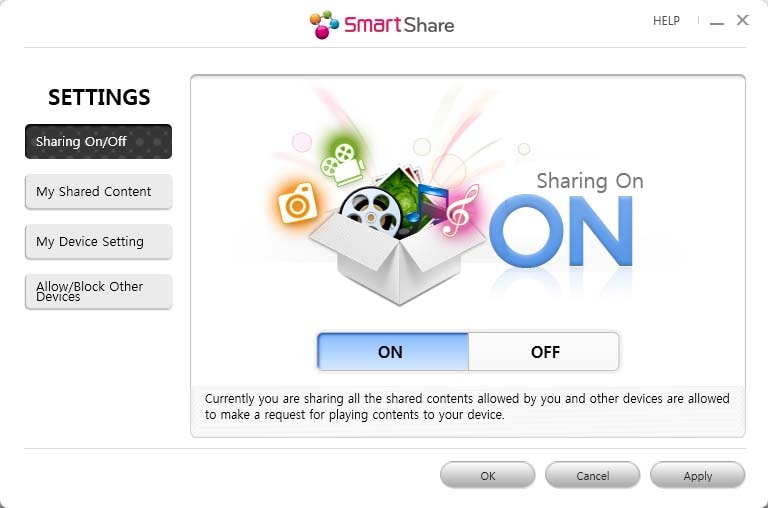
The first settings tab is Sharing On/Off, and it's as simple as it sounds.
On means your files can be seen from other sharing devices, in this case it's your TV.
Off means your files cannot be seen, at least not from this program (you may have other, non-LG, programs allowing file sharing, which is common).


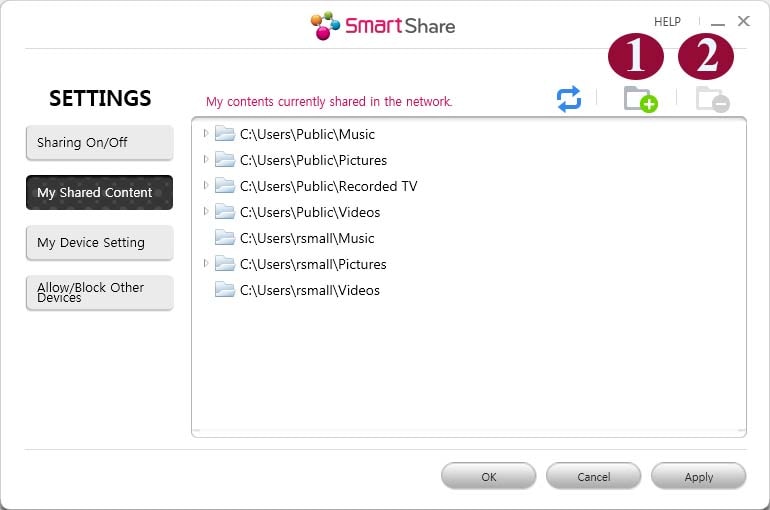
The next settings tab is My Shared Content.
Here you can see all the folders that are being shared.
- Click the Folder Plus Icon
to add new folders.
- Highlight an existing folder, then click the Folder Minus Icon
to remove folders.
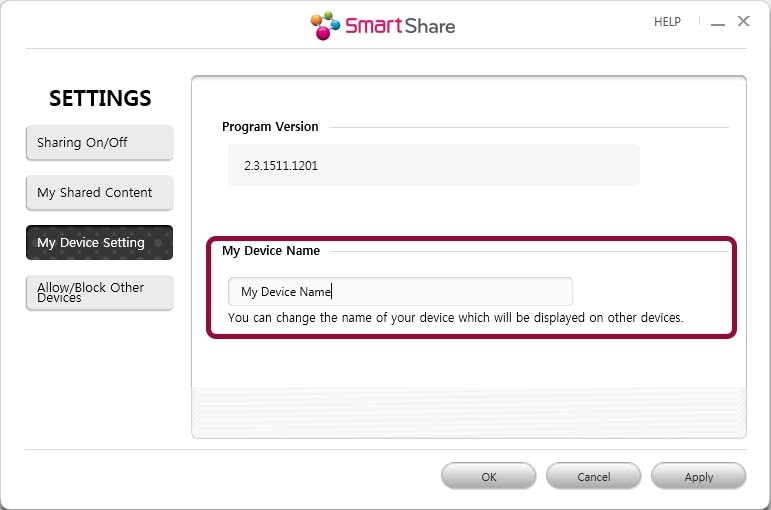
This is My Device Setting tab.
This section allows you to change the name of your PC for sharing purposes.
This is the name that you'll look for if you search for these files from another device, so either remember it for later, or change it to something more obvious, ex. Bob's PC.


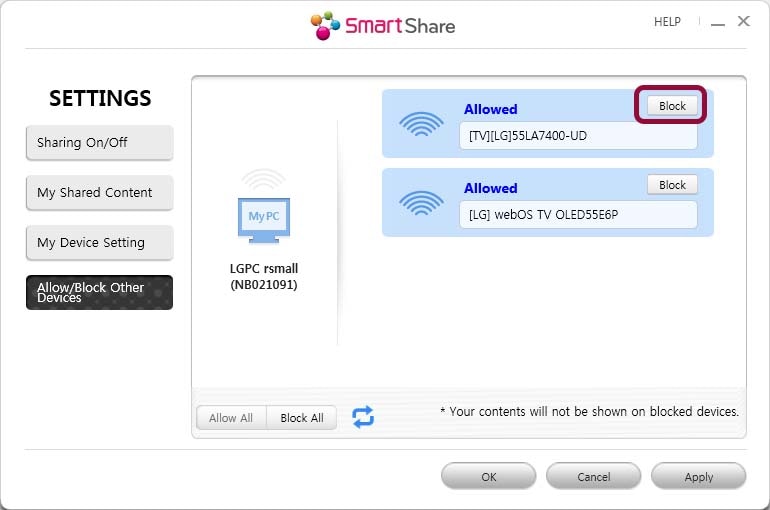
The last settings tab is Allow/Block Other devices.
This can be useful for parental control purposes. If you keep R rated movies or songs with explicit lyrics on your PC, but don't want your young child to play them on their device, block it!
Step 4: Using Smart Share

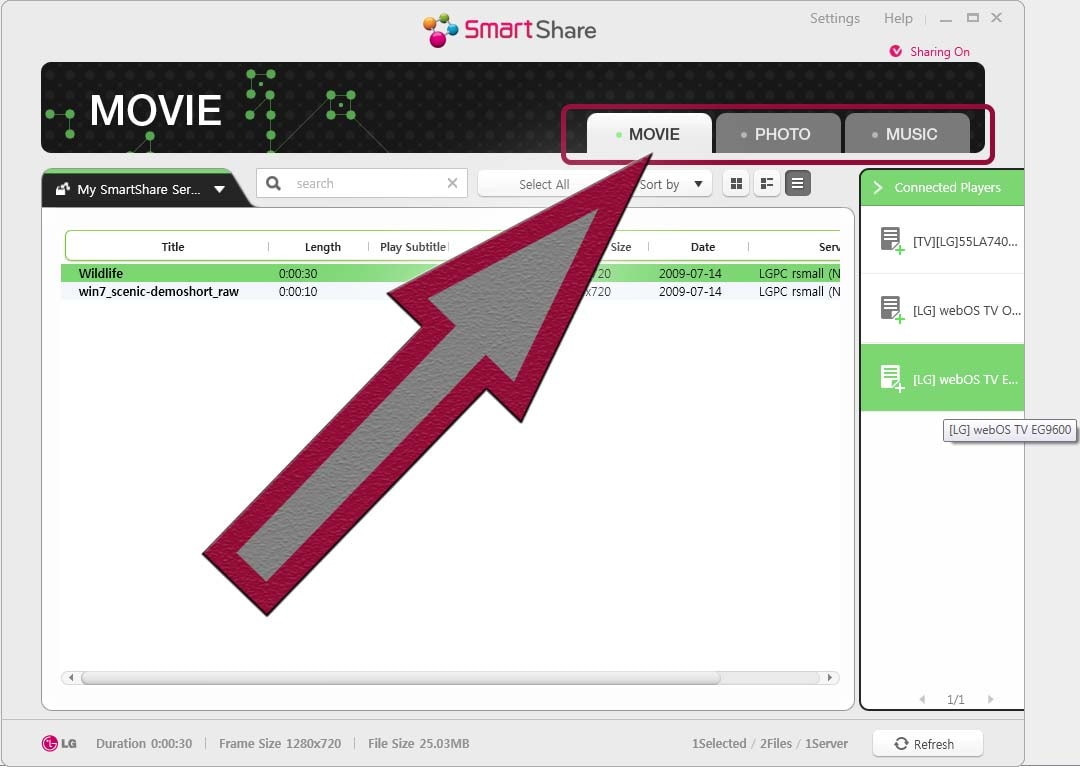
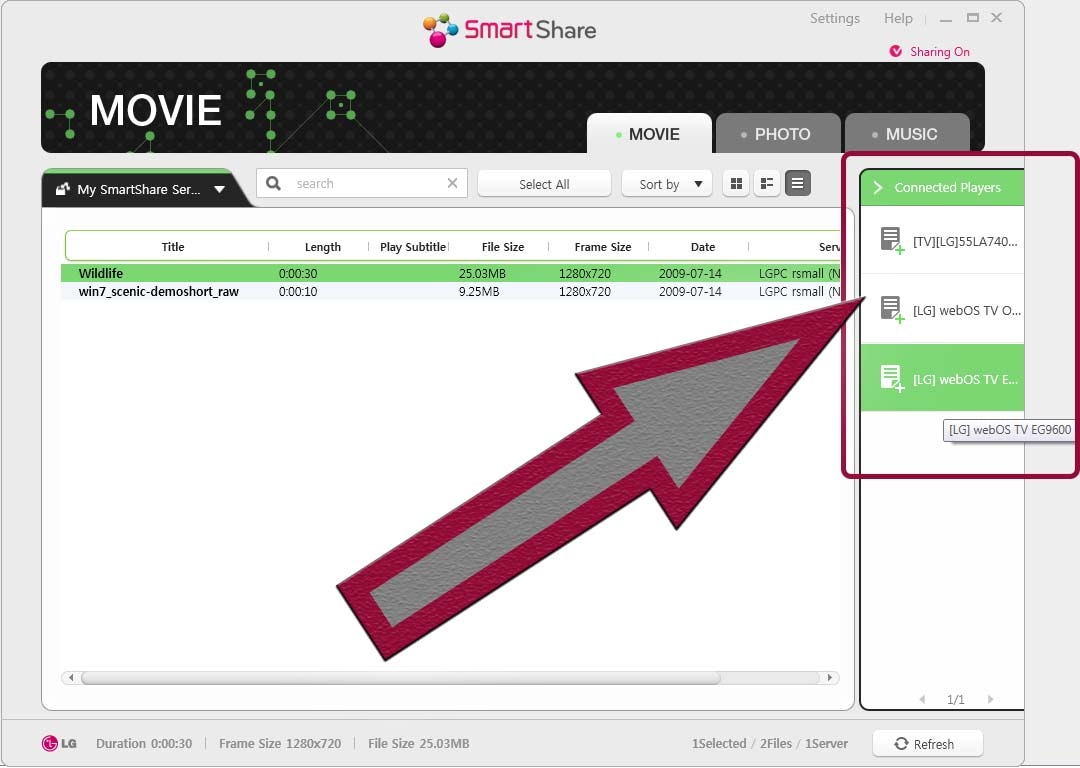
At the top, you can quickly switch between media types (Movies, Photos, and Music).
Click the tab for whatever type of file you want to share.
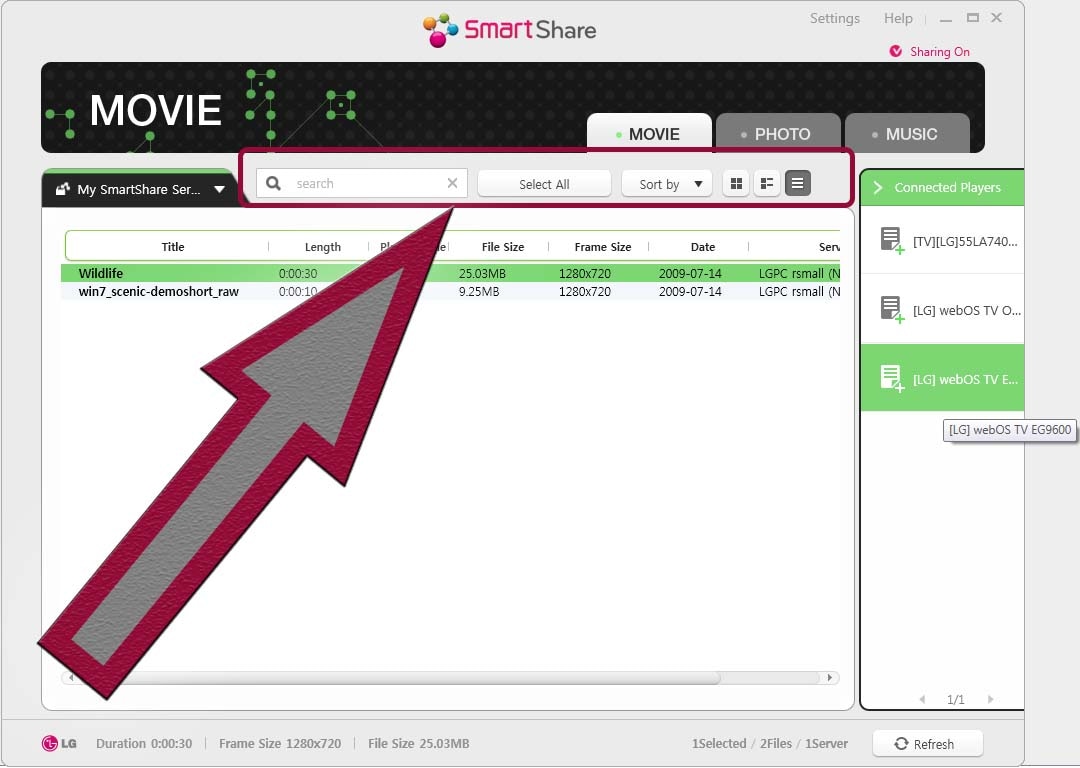
Here you can search through your media, select it all, sort it a certain way, or change how the files are displayed.
If you have a lot of files, these options can be very helpful.
If you like icon style navigation, click the little icon in this section that looks like four squares .


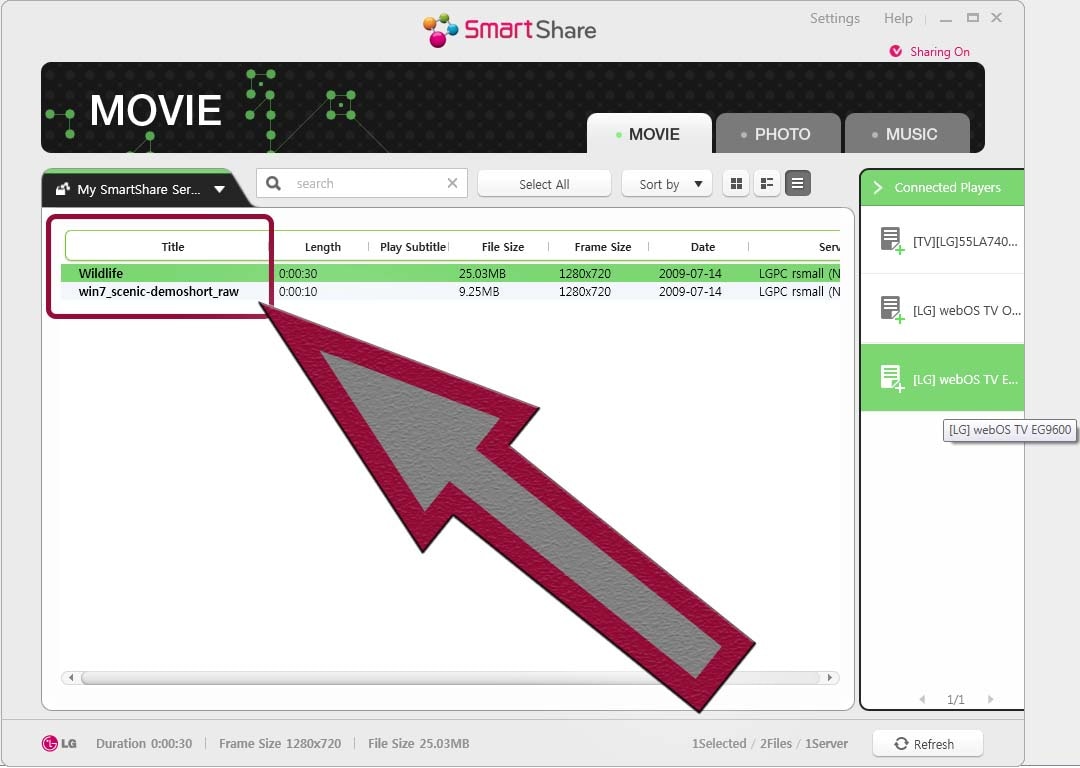
Here, you can select one or more files that you want to play on your TV.
Click once for a single file, hold down the Ctrl key and click for multiple files, or click a file, hold the Shift key, then click another file to select everything between.
Once you've selected the files that you want to see, or hear, on the TV, use the Connected Players area to send them.
If your TV is powered on, and on the same home network as your PC, it will appear in this list.
Just click your TV in the list and your files will start playing!


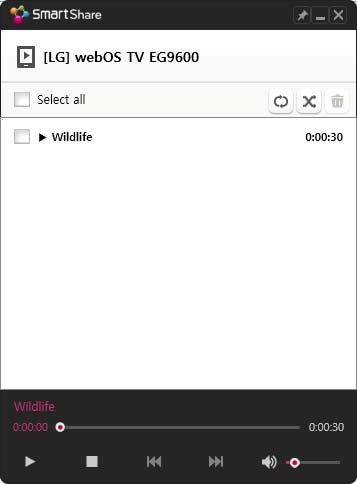
Once playback starts, a small media player window will open. Use this to control Play, Pause, Forward, Back, etc.
You can also control the content from the TV:
This is simpler to use, but more difficult to explain. Smart Share on your TV will be different depending on the TV's Operating System (Platform).
We suggest beginning with the TV Support Center (just close this guide if you're already there).
- Visit the TV Support Center.
- Enter your model number into the search box, then choose the correct model from the drop-down list.
- Click the icon in the bottom-left that says Using Smart Share (icon only appears if Smart Share is available for your TV).