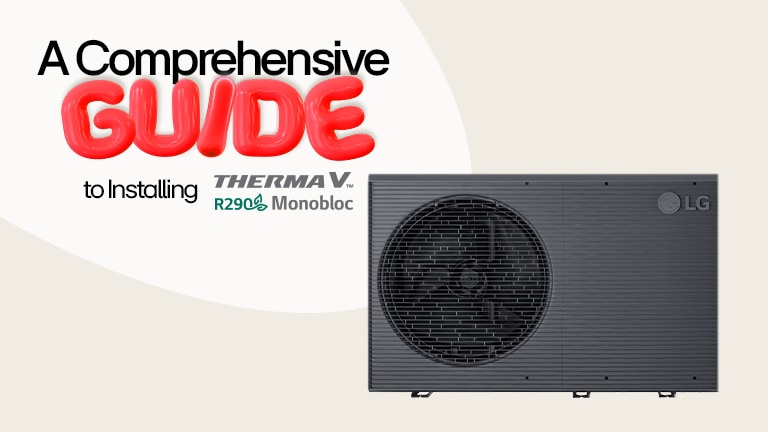
LG Therma V R290 Monobloc Hydro Unit: Installation Guide

Key Takeaways

Major components are already built in. The backup heater, 3-way valve, and 12-litre expansion tank come pre-installed inside the unit, so there's far less to assemble, wire, and connect on site than a traditional component-by-component setup.

No refrigerant work required. The Hydro Unit links to the R290 Monobloc outdoor unit with water piping only — removing on-site refrigerant handling and the specialist work that comes with it.

A wall-hung installation designed for efficient setup. At about 33.6 kg and 700 × 420 × 299 mm, the unit hangs on a bracket rather than taking up floor space with most mounting tasks requiring minimal personnel.

Straightforward piping, wiring, and configuration. Six clearly marked threaded ports, two dedicated cable entries, and DIP switches that ship in a standard default setting keep each stage logical and quick to work through.

Guided commissioning through the HMI. The built-in Commissioning Wizard and Backup Heater Wiring Test walk you through start-up step by step, and built-in Wi-Fi pairs to the LG ThinQ app with no extra modem to fit.

An image showing LG's Therma V R290 Monobloc Hydro Unit which is hung on the wall.

1. Introduction

Setting up a heat pump indoors has usually meant piecing together a number of components on site: the indoor unit, an expansion vessel, 3-way valves, a backup heater, and all the wiring that ties them together. LG's Therma V R290 Monobloc Hydro Unit does away with much of that, gathering the core hydronic parts inside one slim, wall-hung unit built to deliver space heating and cooling. 


It works with an R290 Monobloc outdoor unit and calls for nothing more than water piping between the two, meaning no refrigerant work is needed on site. This guide takes you through the install from beginning to end.


It's useful to know where the Hydro Unit falls within LG's three indoor choices. At the entry point is the Control Unit, which carries only the HMI controller and Indoor unit PCB. At the other end is the Combi Unit, which packs a 200-liter hot water tank into one floor-standing cabinet so a single appliance covers both heating and hot water. The Hydro Unit lands in the middle: a unit that already houses the backup heater, 3-way valve, and 12-liter expansion tank, set up to drive a heating circuit and work with a separate hot water tank connected alongside it.


Much of what makes the Hydro Unit appealing comes down to that wall-hung format. Weighing about 33.6 kg and measuring 700(H) × 420(W) × 299(D) mm, it fixes to a bracket rather than occupying floor space, and through most of the installation a single person can manage it.


*This article is an informal visual overview to help qualified installers follow LG’s official documentation. It is not an installation manual and must not be used as the sole basis for design, installation, or commissioning.

2. Site Preparation

With the unit selected, the first thing to sort out on site is where it will hang. Before lifting it into position, check that the wall is sound and can carry the load, that a drain is within reach, and that the service clearances the unit needs can be held. At roughly 33.6 kg the Hydro Unit is light next to a floor-standing cabinet, but a firm, correctly fixed wall still matters, both for safe mounting and for reaching the unit when it later needs servicing.


2-1. Prepare location:

 • A water-resistant floor beneath the unit with access to the home's drainage.

 • Enough service space secured on every side.

 • No flammable materials in the surrounding area.

 • Nothing set in front of the unit that would get in the way of access.


2-2. Confirm minimum clearance:

 • Left and right sides: 200 mm

 • Top: 250 mm

 • Front: 500 mm

 • Bottom: 1,300 mm

A rendering image shows a concise configuration image of LG Therma V Hydro Unit.

<This image shows the overall dimensions of the mounted LG Therma V Hydro Unit.>

The large gap beneath the unit is one to plan for from the outset. The six water connections and their shut-off valves come out of the underside, so that clearance is what keeps them reachable during the install and easy to service later on.

3. Positioning and Panel Access

With the wall ready, the unit can go up and be opened out for the connections that follow. Rather than standing on the floor, the Hydro Unit hangs from a bracket, so the work is mainly about fixing that bracket securely and hooking the unit onto it. Its light weight means one person can handle most of this, though care is needed not to knock the control panel while lifting.


3-1. Get the unit onto the wall:

 • Drill 2 of the M8 anchor bolts into the wall and fit the mounting bracket to them, checking it sits perfectly level.

 • Lift the unit into place, taking care not to damage the control panel as you raise it.

 • Hang the unit on the bracket, making sure the bracket hook seats into the hole below so the unit is properly held.

A short clip demonstrating how to drill holes for anchoring before mounting LG Therma V Hydro Unit.

<This GIF shows how to drill anchor holes and secure wall anchors before mounting the LG Therma V Hydro Unit.>

3-2. Opening Up the Unit for Installation:

 • Loosen the screws underneath to lower the control panel (HMI).

 • Lift the front panel upwards to release and remove it.

 • Undo the screws holding the control box to the side panel, then swing the control box open. 

 • Fix the unit to the bracket and wall with the remaining anchor bolt.


A point worth keeping in mind for installation: the bracket must sit dead level. If it doesn't, the bracket and unit won't seat together correctly, which makes both the initial hang and any later maintenance far more awkward than they need to be.

A short clip demonstrating bottom screws are loosened with the purpose of gaining access to the installation area.

<This GIF demonstrates how to loosen the bottom screws and lower the control panel to access the installation area.>

4. Water Piping

Now that the unit is hung and open, the plumbing comes next: joining up the water circuits that move heat through the system. The Hydro Unit brings its connections out through six threaded ports on the underside, so each pipe is sealed onto the thread with Teflon tape rather than pressed into place. Use the port layout marked on the unit to keep track of which connection is which as you work.

A short clip demonstrating six threaded water pipes connected beneath LG Therma V Hydro Unit.

<This GIF illustrates the six threaded water pipe connections on the underside of the LG Therma V Hydro Unit.

It shows how each port is identified and sealed with Teflon tape before the water circuits are connected.>

4-1. Work through the six ports:  

• Outdoor unit — connect the outlet and inlet pipes to the R290 Monobloc outdoor unit.

 • Heating circuit —connect the heating circuit inlet and outlet pipes to the emitters, such as radiators or underfloor loops.

 • Domestic hot water —connect the DHW inlet pipe and DHW outlet pipe to the external DHW tank

A short clip demonstrating six water pipe ports are connected on the Hydro Unit.

<This GIF illustrates how to connect the six water pipe ports on the Hydro Unit.

The completed layout helps installers verify the correct piping arrangement before system commissioning.>

4-2. Sealing and Securing Each Joint:

 • Wrap Teflon tape onto the threads to prevent leaks and install shut-off valves at the connections to allow for future maintenance.

 • Draw every fitting up tightly, keeping to the 50 N·m maximum torque at the water connections, and use a suitable sealing method throughout.

 • Check there are no traps anywhere along the pipe runs.

 • Fit a strainer on the outdoor-unit line to keep debris out of the system.


4-3. Charging the System and Clearing the Air:

 • Open the valve on the air vents for both indoor and outdoor units.

 • Open every valve in the water circuit and connect it to the water supply.

 • Once the air is fully purged, close all air vents tightly.

 • Insulate the pipework to cut heat loss and guard against burns.

 • Lastly, close the water supply valve or remove the hose.


*The heating circuit must never be permanently connected to the mains water supply as an open-loop system. Use a system de-coupler or another approved filling method to keep the circuits separated, in line with local regulations.

A short clip demonstrating the way to open the air vent valve after completing the water piping connections.

<This GIF shows how to open the air vent valve after completing the water piping connections.>

5. Electrical Wiring

With the water side finished, the focus shifts to the electrical connections. The Hydro Unit provides two cable entries to help with that: Hole A for the DC line running to the PCB and Hole B for the AC line running to the terminal block. Switch off the power supply before starting any wiring.


*All electrical work, including wiring of the indoor unit, backup heater, and protection devices, must be carried out by a licensed electrician in accordance with national wiring standards and LG’s official installation manual.


5-1. Routing Each Cable Through the Correct Entry:

 • Hole A— the DC line, connected to the PCB inside the control box.

 • Hole B— the AC line, connected to the terminal block.

 • Fit round pressure (ring) terminals at the power terminal block and ensure the wiring is long enough for the indoor unit control box to open freely on its hinge after connection.

A short clip demonstrating electric cables are routed through the cable entry on the LG Therma V Hydro Unit.

<This GIF shows how the electrical cables are routed through the cable entry on the LG Therma V Hydro Unit.

It illustrates separating and positioning the cables inside the unit before making the electrical connections.>

5-2. Working Through the Terminal Blocks in Order:

 • Communication— connect the outdoor unit communication cables to terminals 25 and 26 on Terminal Block 4, using shielded 2-core cable.

 • Main power— route the indoor unit power cable through Hole B and connect it to terminals 27 and 28 on Terminal Block 5 (220–240 V, 50 Hz), including earth.

 • Backup heater— connect the backup heater power cable to Terminal Block 6, including earth.


A short clip demonstrating how to connect the main power supply wires to the terminal block within the Hydro Unit.

<This GIF demonstrates how to connect the main power supply wires to the terminal block inside the Hydro Unit.

It shows the correct wiring positions and terminal layout before the electrical connections are secured.>

5-3. Matching the Backup Heater Wiring to Your Power Supply:

 • 1-phase, 1-step (3 kW): connect L1 and N.

 • 1-phase, 2-step (3/6 kW): connect L1, L2, and N, using the L1–L2 harness supplied in the bag with the manual.

 • 3-phase, 3-step (3/6/9 kW): connect R, S, T, and N.


*For exact wiring diagrams, cable sizing, and protection devices, always refer to the official LG installation manual and local electrical codes. 

A short clip demonstrating several steps into connecting the main power supply wires to the terminal block.

<This GIF demonstrates how to connect the main power supply wires to the terminal block inside the Hydro Unit.>

For reference, the remaining terminals are 21–22 (CN_EXT) and 23–24 (3rd-party controller, 5 V DC). Where the run between indoor and outdoor units exceeds 40 m, keep the communication and power wiring fully separated; the maximum communication wire length is 50 m.

6. System Configuration

Now that the wiring is complete, set the required system configuration using the DIP switches on the indoor unit PCB. Match the settings to the installed options, such as domestic hot water, heating and cooling mode, backup heater capacity. Always cut the power before changing the DIP switch settings. The factory settings are suitable for a standard installation, so only change the switches needed for your setup.


6-1. The Main Settings to Check:

 • SW2-2 and SW2-3 — accessory information: set these to match your setup, whether that's the heat pump alone, the heat pump with a DHW tank, or the heat pump with a DHW tank plus a solar thermal system.

 • SW2-4 — cycle: leave OFF for heating only, or set ON to enable cooling.

 • SW2-6 and SW2-7 — backup heater capacity: set this combination to suit the heater fitted, matching the phase and step wired in Section 5.

 • SW1-3 — outdoor-to-indoor communication: ON for the RS-485 method (9600 bps), OFF for the AC method.

 • SW1-8 — antifreeze agent: ON where antifreeze is used, and note the CN_ANTI_SW bridge must be disconnected for the setting to take effect.

A short clip demonstrating the location of the DIP switches on the Hydro Unit Control board.

<This GIF illustrates the location of the DIP switches on the Hydro Unit control board and how they are configured for installation.>

The full DIP switch reference is printed on the PCB label. Check it against your installation, and change only the switches that apply to your components and site conditions.


6-2. Bringing the Unit to Life and Setting It Up Through the HMI:

 • Confirm that all air has been purged during installation and that the indoor air vents were closed tightly.

 • Slide the front panel back down into place to reattach it. 

 • Lift the control panel and fix it with the two internal screws.

 • Power on the unit so the HMI (6.8-inch touch screen) starts up.

 • Set the control mode, circuits, pump operation, and target temperatures for heating, cooling, and DHW. 


*Never set the antifreeze switch (SW1-8) to ON unless antifreeze agent has actually been added to the system. Enabling the setting without glycol in the circuit can allow the water to reach temperatures it isn't protected against.

A short clip demonstrating the front cover is being reinstalled after the piping and electircal work have been conducted.

<This GIF shows the front cover being reinstalled after the piping and electrical work have been completed.>

7. Commissioning

Now that everything is installed and configured, the last stage is commissioning: the checks and tests that confirm the system is safe to run before it's handed over. Working through them carefully catches any installation faults early, and the Hydro Unit's guided setup wizard keeps the process straightforward.


7-1. Begin with the Pre-Start Checks:

 • Confirm the charged water pressure reads between 2.0 and 2.5 bar, and never above 3.0 bar.  

 • Make sure the air separator cap inside the outdoor unit is left open.  

 • Confirm the communication and power wiring are correct and kept properly separated.

 • Make sure both shut-off valves on the water inlet and outlet are open.

 • Confirm that a device that secures the minimum flow rate, such as a bypass valve or hydronic separator, is fitted; otherwise, flow switch error (CH14) can occur.

 • Check that the unit is fixed tightly to the wall so it can't vibrate or work loose in operation


7-2. Running the Tests and Starting Up:

 • Use the Commissioning Wizard to work through the installer settings and start-up in guided steps.

 • Run the Backup Heater Wiring Test from the HMI setup menu; a result of "checked" confirms the heater is wired correctly.

 • On first power-up, run the unit for a 6-hour preheat before full operation to warm the compressor oil.

A short clip demonstrating a number of settings for installing LG Therma V Hydro Unit.

<This GIF illustrates the guided commissioning sequence on the LG Therma V Hydro Unit HMI.

It shows the Backup Heater Wiring Test and the initial start-up procedure.>

7-3. Bringing the System Online:

 • In the LG ThinQ app, tap Add devices and select Deluxe Wired Controller.

 • On the HMI, go to Settings → General Settings → Remote Controller Wi-Fi Pairing and tap Connect.

 • Once paired, the system is ready for remote monitoring and control.

A short clip demonstrating how to access Wi-Fi setting on the control panel of LG Therma V Hydro Unit.

<This GIF shows how to access the Wi-Fi settings on the control panel of the LG Therma V Hydro Unit and connect the unit to the LG ThinQ.>

And that's the installation complete, with the Therma V R290 Hydro Unit ready to operate.

FAQs

Q.

Q. Does the Hydro Unit come with a hot water tank?

A.

A. No. The Hydro Unit connects to an external domestic hot water tank through its cold-water inlet and hot water outlet ports. The tank is chosen and installed separately to suit the home.

Q.

Q. Does the Hydro Unit need refrigerant piping on site?

A.

A. No. It links to the R290 Monobloc outdoor unit with water piping only, so there's no on-site refrigerant work involved.

Q.

Q. What size backup heater does the Hydro Unit have?

A.

A. The built-in backup heater is rated 3/6 kW on a single-phase supply and 3/6/9 kW on a three-phase supply. The wiring and matching DIP switch setting are chosen to suit the phase and capacity of the installation.

Q.

Q. Does it require a separate Wi-Fi modem?

A.

A.  No. Wi-Fi is built into the HMI controller. Pairing is handled through the LG ThinQ app with no extra hardware to fit.

Q.

Q. Who should install the Hydro Unit?

A.

A. Installation must be carried out by a qualified professional in line with local regulations. This guide does not interpret or override any legal or regulatory requirements.

More about LG HVAC

* Products and solutions may vary according to country and operating conditions.

red image

red image

Get Your Expert Consultation

Connect with our specialists for tailored solutions — every question matters to us.

white bg color image on colorful image

white bg color image on colorful image

Subscribe to LG HVAC Blog
Newsletter